Table of Contents
- Breaking Changes
- Installation
- Profile Settings
- Uploading Images
- Collections
- Anonymous Image Uploading
- Image Editing
- Shortcodes
- Tutorials
- Hooks
- Frequently Asked Questions
- ImagePress Filters
Breaking Changes
Version 8.1.5 changes the category taxonomy name from imagepress_image_category to image-category. After updating to 8.1.5, go to ImagePress Settings -> Dashboard to migrate to the new taxonomy name. No action is required on your part, just visit the Dashboard and you are all set. If required, regenerate (re-save) your Permalinks.
Installation
ImagePress requires WordPress 4.9 or higher in order to function as intended. We recommend the latest version of WordPress. In addition to this, PHP 7+ is required for certain functions and modules. Check with your host before attempting to install ImagePress.
Minimum requirements
✅ WordPress 4.9+
✅ PHP 7+
Recommended requirements
✅ WordPress 6.0+
✅ PHP 8+
Optimal requirements
✅ WordPress 6.4+
✅ PHP 8.2+
In addition to the requirements above, ImagePress requires the Permalinks structure to have the post name (/%postname%/) in its structure. It will still work without it, but some features might not be available.
- Upload the
/imagepress/folder to your/wp-content/plugins/directory - Activate the plugin via the Plugins menu in WordPress
- A new ImagePress menu will appear in the WordPress menu area
ImagePress works out of the box, but because of its complexity, some settings, and options need to be set beforehand. Note that some features require the block editor to be available, and they won’t work with custom page builders.
Basic Installation
1. Create a gallery page by using the [imagepress-loop filters="yes"] shortcode.
2. Create an image/photo upload page by using the [imagepress-add] shortcode.
That’s it! You have a basic ImagePress installation up and working.
Head over to ImagePress → ImagePress Settings in your Dashboard menu and check the Settings and Configurator tabs for design related changes and settings.
Template Files for Images (optional)
ImagePress is designed to work right out of the box with most WordPress themes. It does this by using a template hierarchy system in the same way WordPress does. When you create a new image in ImagePress and view the front-end page, chances are it will display just like a single blog post in your theme. That’s because ImagePress will use the single.php template file in your theme to display the image page. For many themes, that is perfectly fine. For others, not so much. The good news is you’re not stuck with it. You can create a template file used only by ImagePress single images.
ImagePress only uses the single.php template because it can’t find the one it’s looking for: single-image.php. If that template file exists, ImagePress will use it to display single images instead of the template for blog posts.
To create your single-image.php template, copy the single.php or singular.php file from the root of your parent them into the root of your active (child) theme. Then rename the file single-image.php.
Inside this function, remove the the_content() function and replace it with the ImagePress code:
<?php
if ( function_exists( 'ip_main_return' ) ) {
    echo ip_main_return( get_the_ID() );
}
?>
The single-image.php allows you to have a customized image template, with custom links and fields. An example template is provided inside the /documentation/ folder. ImagePress will notify you if the template exists in the Installation tab, inside ImagePress options. Note that -image is the actual image post slug, so if your image post slug is photo, you should have a single-photo.php template file.
Note: This template is now in use for your single image pages. To confirm, make a small edit to that file, save, and view an image page on the frontend of your site to see the change.
Template Parts
It’s very possible that your WordPress theme uses the get_template_part() function inside of template files for better file organization. This function allows theme developers to take a portion of a template file and place it in another file.
If the single.php file you copied uses get_template_part() to remove part of the single post HTML into another file, your new single-image.php file will do the same. Use the parameters in the function to find which file holds this HTML.
For example, get_template_part( 'content', 'single' ) refers to content-single.php.
The code in this file (typically just the HTML, not the opening PHP tag at the top of the file) can be copied and pasted in place of the <?php get_template_part(); ?> call from your single-image.php file. That way, you have all the template to play with as you design your single image page.
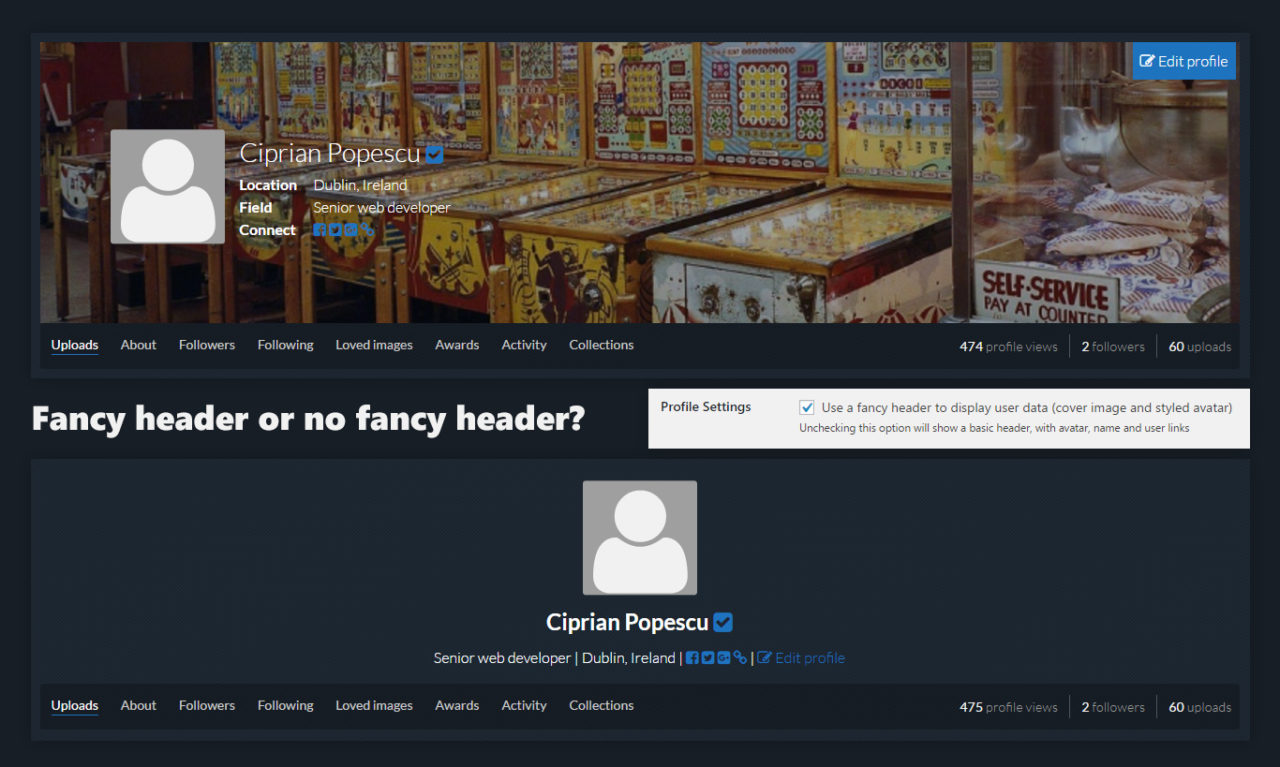
Profile Settings
Switch between a fancy user profile header (cover photo + avatar + various information) and a basic one. See the screenshot below for an example:
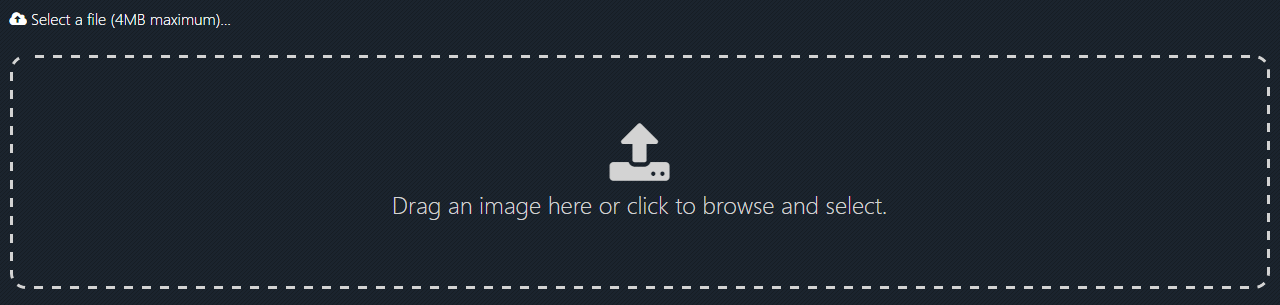
Uploading Images
Uploading images is done optionally via drag and drop. Drag and drop upload requires a modern browser and a switch inside ImagePress Settings → Upload tab.
Collections
Collections are used to group two or more (unlimited) images and display them on the user profile page, a dedicated page or, using a shortcode, any page.
Use this shortcode to add it on any page:
[imagepress-collections count="4"]
Use this PHP code to add it as a shortcode:
<?php echo do_shortcode('[imagepress-collections count="4"]'); ?>
Or add this code directly in your theme:
// collections button (optional, can be placed in the sidebar)
if (function_exists('ip_frontend_add_collection'))
    ip_frontend_add_collection(get_the_ID());
Note: In order to view collection images, you need to create a viewer page, which should contain the collections shortcode: .
In order for collections to be visible on any page, they need to have four or more images inside. Collections can be public or private. Private collections are only visible to their author, inside the profile editor.
Anonymous Image Uploading
Use the steps below to enable the name and email address for unregistered users, allowing anonymous upload (not recommended).
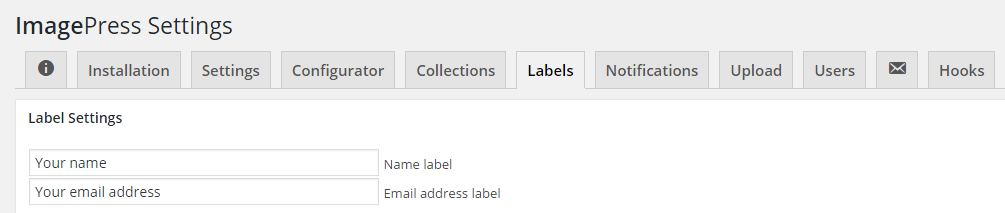
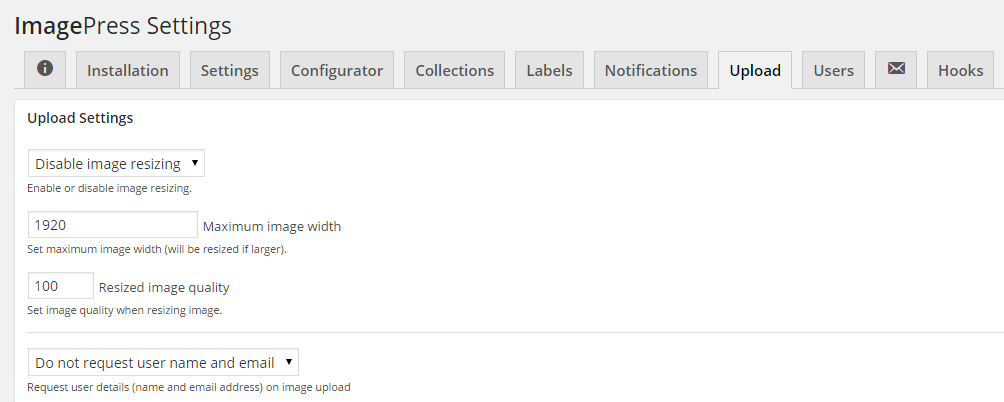
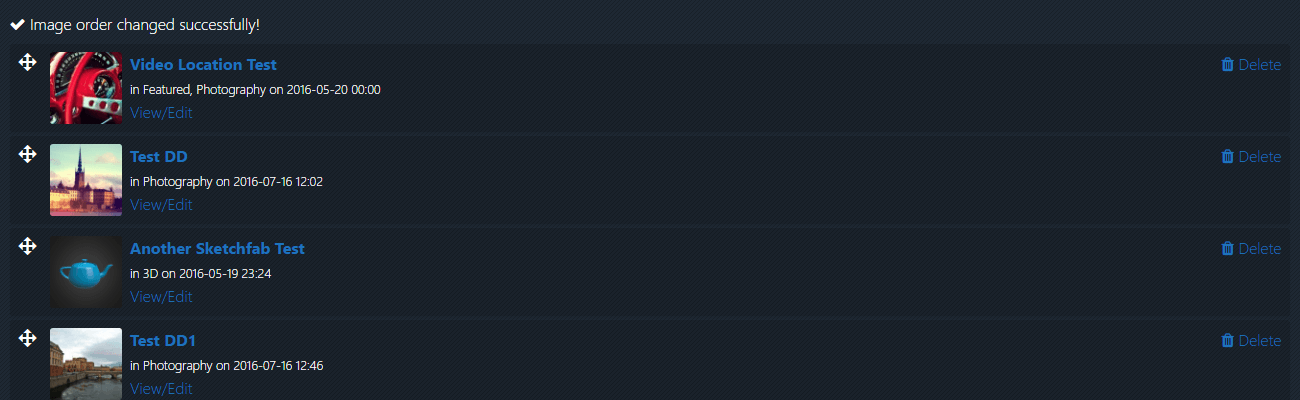
Image Editing
Image reordering and removal is accessible from the profile editor, the last tab (with a cog icon).
Shortcodes
All the shortcodes and their explanation can be found on the Dashboard tab of your ImagePress plugin. Other undocumented shortcodes can be found below.
[imagepress type="top"]
This shortcode displays the most popular image, based on views and votes.
[imagepress mode="likes" count="5"]
This shortcode displays the titles of the most liked/voted images.
[imagepress mode="views" count="5"]
This shortcode displays the titles of the most viewed/visited images.
[imagepress mode="rand"]
This shortcode displays a random image.
Tutorials
Note that some tutorials may use old/deprecated code. We try to maintain all tutorials up to date, but feel free to contact us if something doesn’t work.
ImagePress – How to create a taxonomy template
If you are not using Noir UI theme, you can easily create a taxonomy page for any theme and view the image archive/category using the ImagePress grid.
Add a file called taxonomy-image-category.php inside your theme’s root directory and add the code below. Make sure you match your theme’s design (e.g. in the example below, we have <div class="container content">, but maybe your theme has a different structure).
<?php
/**
* ImagePress taxonomy template
*
* Taxonomy template with queried parameter as shortcode argument.
*
* @package ImagePress
* @subpackage Template
*/
?>

<?php get_header(); ?>

<div class="container content">
    <h1 class="entry-title"><?php echo get_queried_object()->name; ?></h1>

    <div class="wrap-content-inner">

        <?php
        // Get taxonomy term from WordPress query
        $ip_taxonomy_term = sanitize_title( get_queried_object()->name );

        // Display shortcode based on queried taxonomy term
        echo do_shortcode( '[imagepress-loop category="' . $ip_taxonomy_term . '"]' );
        ?>

    </div>
</div>

<?php
get_footer();
Note that you might need to make some changes in order to accommodate your theme’s structure.
ImagePress – How to customize your single image template
ImagePress – How to create a notifications section
If you are not using our Noir UI theme, you can easily create an ImagePress notifications section for any theme.
If you want to create a separate page for the notifications, use the [notifications] shortcode. If you want to create a dynamic menu item, use the ip_notifications_menu_item() template function.
If you are using a custom menu in your theme, use the following code:
<?php if (is_user_logged_in()) { ?>
    <div class="bell-pepper"><?php echo ip_notifications_menu_item(); ?></div>
<?php } ?>
You can style the notifications number and the bell as you see fit. Here’s some CSS help:
.notifications-bell {
    padding: 0 12px;
    font-size: 20px;
}

.bell-pepper {
    display: inline-block;
    position: relative;
}

.bell-pepper .notifications-container {
    right: 0;
}

.notifications-bell:hover {
    color: #E58652;
    background: none;
    box-shadow: none;
}

.notifications-bell:hover i {
    color: #E58652;
}

.notifications-bell:hover sup {
    background-color: #ffffff;
    color: #E58652;
}

.notifications-container a {
    color: #E58652;
    background: none;
}

.notifications-container a:hover {
    color: #ffffff;
    background: none;
}
ImagePress – How to create a member directory
List your members (with published images) using the [imagepress-member-directory] shortcode.
ImagePress Lightbox
ImagePress Lightbox is an ImagePress add-on which allows images to automatically open into a responsive lightbox. No configuration required.
- Minimal and lightweight, no dependencies required.
- Keyboard arrow keys to navigate and escape to close.
- Swipe gestures supported on touch devices.
- Spread/pinch to zoom in/out supported on touch devices.
- MouseWheel for next/prev images.
- Ctrl+MouseWheel to zoom in/out.
- SVG Icons.
- Native CSS transitions.
- Light and dark themes.
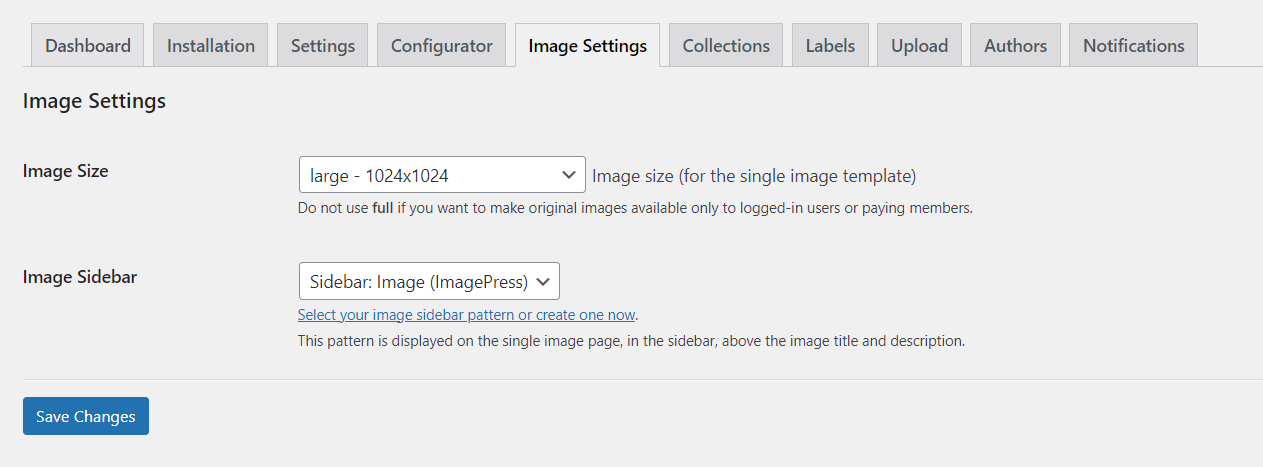
How to add content to the single image sidebar
WordPress has a new feature called Patterns (formerly known as Reusable Blocks). Using this feature, we can add content to the image page sidebar, such as sharing icons, tutorials, announcements and so on.
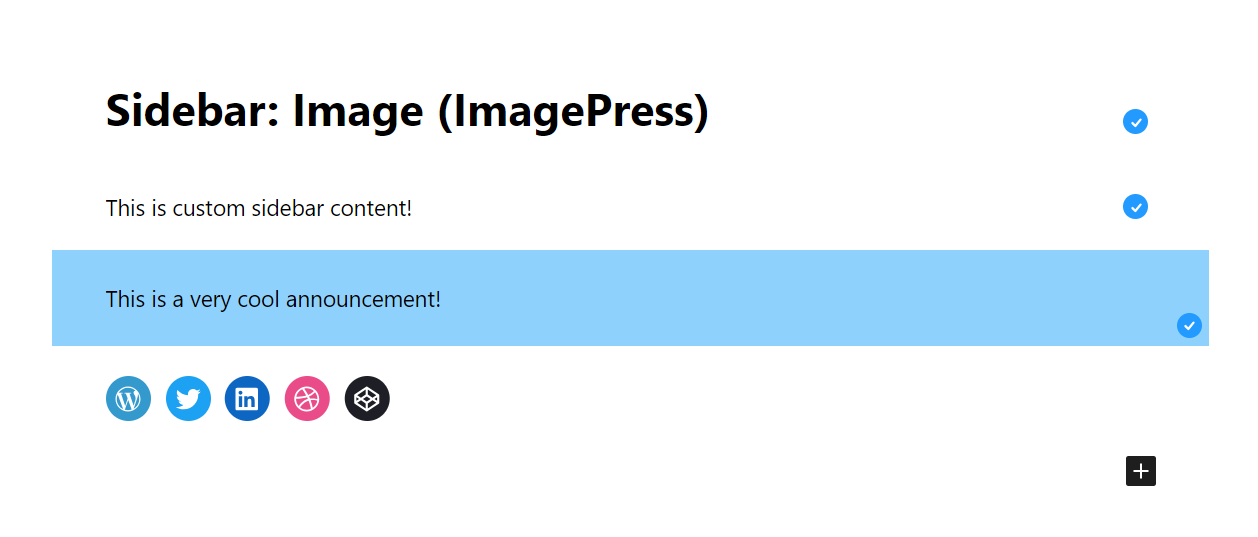
First, create a new pattern. Second, assign the pattern in ImagePress Settings → Image Settings:
My sidebar could look like this:
More Tutorials
- How to configure your ImagePress grid
- How to configure your uploader for best results
- How to manage your ImagePress account
- Image behaviour in ImagePress – single page or media view
- How to create a collection
- How to get random authors with at least one published image

Hooks
How to add content to the single image template
Note: This code should be added to a custom functionality plugin, not to your theme and not to ImagePress itself.
The single image template has two sections: the main image and the sidebar.
For these two sections, there are two hooks available – imagepress_main_content and imagepress_sidebar_content.
<?php
add_action( 'imagepress_main_content', 'my_hook_main_callback' );
add_action( 'imagepress_sidebar_content', 'my_hook_sidebar_callback' );
Let’s add some content below the image:
<?php
function my_hook_main_callback( $image_id ) {
    echo '<p>This is additional content, a notification, a link, an announcement or anything else.</p>';
}

add_action( 'imagepress_main_content', 'my_hook_main_callback' );
Now, let’s add something more advanced to the sidebar, a link to a downloadable, high-resolution image. Note that the image ID is available as an $image_id variable.
There are two options:
1. Show the large size image (defined in ImagePress Settings → Image Settings) and display a download button for the full size image.
2. Use the native downloadable image feature.
<?php
function my_hook_sidebar_callback( $image_id ) {
    // 1. Full size image URL
    $post_thumbnail_id  = get_post_thumbnail_id( $image_id );
    $image_attributes   = wp_get_attachment_image_src( $post_thumbnail_id, 'full' );
    $post_thumbnail_url = $image_attributes[0];

    echo '<p>
        <a href="' . $post_thumbnail_url . '" class="thin-ui-button thin-ui-button-regular thin-ui-button-neutral" download><i class="icofont-download"></i> Download</a>
    </p>';

    // 2. Downloadable attachment URL
    $parent_id     = $image_id;
    $attachment_id = imagepress_get_downloadable_attachment_id( $parent_id );

    if ( $attachment_id ) {
        // Attachment with 'imagepress_is_downloadable' meta key value of 1 found
        echo '<p>
            <a href="' . wp_get_attachment_url( $attachment_id ) . '" class="thin-ui-button thin-ui-button-regular thin-ui-button-neutral" download><i class="icofont-unlock"></i> Download</a>
        </p>';
    } else {
        // No matching attachment found
    }
}

add_action( 'imagepress_sidebar_content', 'my_hook_sidebar_callback' );
Only use one option, otherwise you will end up with two buttons.
Now, let’s add an even more advanced button to the sidebar. For example, if you have paid plans and are using a membership plugin, you can use the membership plugin’s native functions to check for a specific plan.
In the example below, I am using the Paid Member Subscriptions plugin, and I am testing for a downloadable image, a logged-in user, and a plan with ID 123. If all conditions are met, then the button is displayed.
<?php
function my_hook_sidebar_callback( $image_id ) {
    // 1. Paid Member Subscriptions plugin
    $parent_id     = $image_id;
    $attachment_id = imagepress_get_downloadable_attachment_id( $parent_id );

    if ( $attachment_id && is_user_logged_in() && pms_is_member_of_plan( [123] ) ) {
        // Attachment with 'imagepress_is_downloadable' meta key value of 1 found
        echo '<p>
            <a href="' . wp_get_attachment_url( $attachment_id ) . '" class="thin-ui-button thin-ui-button-regular thin-ui-button-neutral" download><i class="icofont-unlock"></i> Download</a>
        </p>';
    } else {
        // No matching attachment found
    }
}

add_action( 'imagepress_sidebar_content', 'my_hook_sidebar_callback' );
In the example below, I am using the Paid Memberships Pro plugin, and I am testing for a downloadable image, a logged-in user, and a plan with ID 123. If all conditions are met, then the button is displayed.
<?php
function my_hook_sidebar_callback( $image_id ) {
    // 2. Paid Memberships Pro plugin
    $parent_id     = $image_id;
    $attachment_id = imagepress_get_downloadable_attachment_id( $parent_id );

    if ( $attachment_id && is_user_logged_in() && pmpro_hasMembershipLevel( 123 ) ) {
        // Attachment with 'imagepress_is_downloadable' meta key value of 1 found
        echo '<p>
            <a href="' . wp_get_attachment_url( $attachment_id ) . '" class="thin-ui-button thin-ui-button-regular thin-ui-button-neutral" download><i class="icofont-unlock"></i> Download</a>
        </p>';
    } else {
        // No matching attachment found
    }
}

add_action( 'imagepress_sidebar_content', 'my_hook_sidebar_callback' );
Using the same function as above, you can replace the bold code with your own plugin’s code.
Frequently Asked Questions
Q: How do I migrate from [[imagepress_top]] to the new [imagepress] shortcode?
A: ImagePress uses a new, universal shortcode, [imagepress]. This shortcode replaces the top image (most viewed image or most liked image). To replace your old shortcodes, just replace the [[imagepress_top]] shortcode with [imagepress type="top" mode="views" count="1"] to display the most viewed image or [imagepress type="top" mode="likes" count="1"] to display the most voted image.
Q: How do I set a default collection for all uploads?
A: There is no default option for this behaviour, so the code below will accomplish this. Add it to your JS functions file and change the 55 with your collection ID:
jQuery(document).ready(function() {
    jQuery('.ip-uploader #ip-collections').val(55).prop('disabled', true) && jQuery('.ip-uploader .ip-collection-create-new').hide();
});
Q: How do I show an image grid sorted by likes?
A: Use the [imagepress-loop sort="likes" count="10"] shortcode.
ImagePress Filters
Example #1
This example will add a custom field value to the ip_box_bottom element in image grid:
function ip_get_custom_field($id) {
    $field = get_post_meta($id, 'fieldname', true);

    return $field;
}
add_filter('do_ip_box_bottom', 'ip_get_custom_field');