Here is a collection of random jQuery code snippets, created during various past projects. Note that they require the jQuery library and some require various CSS classes and/or a certain HTML structure.
Table of Contents
- Dropdown autocomplete with contenteditable fields
- How to defer image loading with JavaScript/jQuery
- How to measure page loading time
- Ping a remote PHP file and store data in a MySQL database with jQuery
- jQuery equal height for all elements
- Generate a password using jQuery
- Trigger an event when user reaches the bottom of the page
- jQuery – Sort elements based on data attributes
- jQuery – Order elements based on data attributes
- Old school image preload with jQuery
- jQuery ul/li sorting (random code snippet)
- Simple jQuery accordion UL/LI menu
- jQuery autocomplete/autosuggest from MySQL database
- jQuery/CSS fullscreen background slider
- IP address geocoding using Google Maps and jQuery
- jQuery $.browser replacement function (deprecated)
- Count DOM elements and display the total value
- Pad digits when you need to display numbers as 01, 02, 03 … 10, 11, 12, 13 … 99
- Remove duplicate elements (<option>) of a <select> dropdown
- Sort elements (<option>) of a <select> dropdown, based on name (alphabetically)
- Set/get cookies
- Use the cookie functions above to set cookies based on an input element
- Highlight active menu item
- Send Google Analytics event on element click
- Get URL parameters
- Animate expanding height of a textarea element on focus and collapsing it when clicking a button
- Text-only tooltip based on the title attribute
- Zebra table with one jQuery line
- Get the background image width inside a variable size element
- Poor man’s lazy loading
- Sticky navigation bar
- Prevent double clicking anywhere in the DOM
More tutorials and snippets: JavaScript | WordPress
Dropdown autocomplete with contenteditable fields
If you ever needed a contenteditable field to have autocomplete, or to show a dropdown of possible values, look no more. I did it using jQueryUI. Not the best library, but I’m working on a vanilla JavaScript version.
Check out a live demo on JSFiddle.
How to defer image loading with JavaScript/jQuery
We all know that an HTML page with more than 100 images will be relatively slow to load with no asset control. Loading images on a page is like unloading containers from a ship. It’s a nice analogy. If a bot or a crawler, or even a visitor hits this page, they will have to wait a while until the initial page render. I have found that the best solution for this is not lazy loading images, but deferring them altogether.
After the image is initialized, the lazy loading process can begin. My deferring approach is similar to lazy loading, but it renders all images automatically after page load. The trick is not to use a loop (such as each()) but to allow jQuery to use the DOM to generate everything.
I have a stress test on CodePen loading 999 images in a blink.
The low-down of the code is an <a> element:
<a href="#" data-defer-src="https://placehold.it/200x200"></a>
and a bit of jQuery:
$(window).load(function() {
    $('a[data-defer-src]').prepend(function(index) {
        var src = $(this).data('defer-src');

        return '<img width="200" height="200" alt="" src="' + src + '" class="deferred">';
    });
});
The jQuery bit can be improved to detect image size and to add various classes or IDs. It is a placeholder for a full fledged function or plugin.
The purpose of this code is to load a huge page with thousands of images in less than a second, then load each of them after the other page elements have been displayed. The code can be modified to accept a delay before starting to load images, or even a trigger, such as a button or an action.
How to measure page loading time
This code will show you how to measure the loading time from the moment you click on a link until the linked page loads completely. I have used this function to measure the loading time of 5 pages within a sales funnel.
Step 1 is setting the link event listener:
$(document).on('click', '.link', function(event) {
    var time_then = new Date().getTime();

    localStorage.setItem('ip2timing', time_then);
});
Step 2 is getting the saved data and pinging a specific URL in order to save the values in a database:
var ip = document.getElementById('ip').innerHTML,
    time_then_concat = localStorage.getItem('ip2timing'),
    time_then = time_then_concat.split('|').pop(),
    ip_ex = time_then_concat.split('|'),
    ip_ex = ip_ex[0],
    time_now = new Date().getTime(),
    page_id = '7'; // get the ID using a data attribute, a Javascript variable, an AJAX call or a PHP variable
function ip2timing() {
$.extend($, {
Ping: function Ping(url, timeout) {
timeout = timeout || 1500;
var timer = null;
return $.Deferred(function deferred(defer) {
var img = new Image();
img.onload = function() { success('onload'); };
// onerror is also success, because this means the domain/IP is found, only the image not
img.onerror = function() { success('onerror'); };
var start = new Date();
img.src = url += ('?cache=' + start);
timer = window.setTimeout(function timer() { fail(); }, timeout);
function cleanup() {
window.clearTimeout(timer);
timer = img = null;
}
function success(on) {
cleanup();
defer.resolve(true, url, new Date() - start, on);
}
function fail() {
cleanup();
defer.reject(false, url, new Date() - start, 'timeout');
}
}).promise();
}
});
// check if IP address is the same
if(ip === ip_ex) {
$.Ping('https://www.example.com/search-timing.php?duration=' + (time_now - time_then)/1000 +
'&page_id=' + page_id +
'&when=' + time_now)
.done(function(success, url, time, on) {
//console.log("ping done", arguments);
}).fail(function (failure, url, time, on) {
//console.log("ping fail", arguments);
});
localStorage.removeItem('ip2timing');
}
}window.addEventListener ? window.addEventListener('load', ip2timing, false) : window.attachEvent && window.attachEvent('onload', ip2timing);Note that I am using the same Ping function from below.
Ping a remote PHP file and store data in a MySQL database with jQuery
I have recently needed to store details in a remote database using Javascript. The obvious choice was a GET request and a PHP file on the remote end.
The PHP file looks like this:
<?php
$var1 = (int) $_GET['var1']; // this is a number
$var2 = (float) $_GET['var2']; // this is a float
$var3 = (string) $_GET['var3']; // this is a string

// connect to database
require_once 'database.php';

$result = $db->prepare("INSERT INTO table (var1, var2, var3) VALUES ('$var1', '$var2', '$var13')");
$result ->execute();

return 'success';
die;
?>
Note that all variables are picked up using $_GET and they need to be properly sanitized. I also need to connect to the database or include the connection file. The action returns a string ("success" in this case) and then dies.
The Javascript code to ping the PHP file looks like this:
<script>
$.Ping('https://www.domain.com/file.php?var1=256&var2=3,6&var3=string').done(function(success, url, time, on) {
    console.log("ping done", arguments);
}).fail(function (failure, url, time, on) {
    console.log("ping failed", arguments);
});
</script>
Note that you can pass Javascript variables to the URL.
And, finally, the actual Ping() function looks like this:
<script>
/*
 * URL Ping
 *
 * Useful for cross-origin calls when information
 * can be posted via parameters and collected via GET
 *
 */
jQuery.extend($, {
    Ping: function Ping(url, timeout) {
        timeout = timeout || 1500;
        var timer = null;
        return jQuery.Deferred(function deferred(defer) {
            var img = new Image(),
                start = new Date();
            img.onload = function() {
                success('onload');
            };
            img.onerror = function() {
                success('onerror');
            }; // onerror is also success, because this means the domain/ip is found, only the image not;

            img.src = url += ('?cache=' + start);
            timer = window.setTimeout(function timer() { fail(); }, timeout);

            function cleanup() {
                window.clearTimeout(timer);
                timer = img = null;
            }

            function success(on) {
                cleanup();
                defer.resolve(true, url, new Date() - start, on);
            }

            function fail() {
                cleanup();
                defer.reject(false, url, new Date() - start, 'timeout');
            }
        }).promise();
    }
});
</script>
That’s it!
jQuery equal height for all elements
I have recently used this function for our ImagePress plugin. We needed to make all the boxes use the same height, after all of them have been loaded.
For this DOM structure:
<div class="ip-list">
    <div class="ip-box">my content here</div>
    <div class="ip-box">my content here</div>
    <div class="ip-box">my content here</div>
</div>
I have used this function:
jQuery(window).load(function() {
    equalheight = function(container) {
        var currentTallest = 0,
            currentRowStart = 0,
            rowDivs = new Array(),
            $el,
            topPosition = 0;

        jQuery(container).each(function() {
            $el = jQuery(this);
            jQuery($el).height('auto');
            topPosition = $el.position().top;

            if (currentRowStart != topPosition) {
                for (currentDiv = 0 ; currentDiv < rowDivs.length ; currentDiv++) {
                    rowDivs[currentDiv].height(currentTallest);
                }
                rowDivs.length = 0;
                currentRowStart = topPosition;
                currentTallest = $el.height();
                rowDivs.push($el);
            } else {
                rowDivs.push($el);
                currentTallest = (currentTallest < $el.height()) ? ($el.height()) : (currentTallest);
            }

            for (currentDiv = 0 ; currentDiv < rowDivs.length ; currentDiv++) {
                //console.log(currentTallest);
                rowDivs[currentDiv].height(currentTallest);
            }
        });
    }

    //console.log('creating equal heights...');
    equalheight('.ip-list .ip-box');
});

jQuery(window).resize(function(){
    equalheight('.ip-list .ip-box');
});
That’s it. Note the jQuery() notation — instead of $() — for WordPress compatibility.
Generate a password using jQuery
Enforcing a strong password might be tricky, but using an automated jQuery process, you can offers users password generation on the registration form.
The HTML:
<p>
    <input type="text" name="password" id="password" placeholder="Password" value="">
    <a href="#" id="password-generate">Generate</a>
</p>
The jQuery:
$('#password-generate').click(function(e) {
    var password = (Math.random()*1e32).toString(36);
    $('#password').val(password);

    e.preventDefault();
});
Note that I have used a text field for illustrative purposes. When creating a new account and generating a password, it is not necessary to hide it.
Trigger an event when user reaches the bottom of the page
One of my previous clients needed a certain action to be performed when the user scrolled to the bottom of the page, or reached the last element in a list.
These is how I did it. The first example will trigger the visibility of an element when the user reaches the bottom. Obviously, you can add your own events.
$(window).scroll(function() {
    // test if at the bottom
    if($(document).height() - $(window).height() - $(this).scrollTop() == 0) {
        // do something here, like showing a popup element
        $('#popup').show();
    }
});
The second example will trigger the visibility of an element when the user reaches the last li element in a ul list. Again, obviously, you can add your own events.
$(window).scroll(function() {
    // test if last element of the same type is visible
    // such as the last result in a list (ul/li) structure
    if($('#list li:last-of-type').is(":visible")) {
        // do something here, like showing a popup element
        $('#popup').show();
    }
});
That’s it!
jQuery – Sort elements based on data attributes
My latest client project had a huge list of elements which needed to be sorted on the fly based on several data attributes. I approached this by using jQuery and HTML5 data-attribute="my-value".
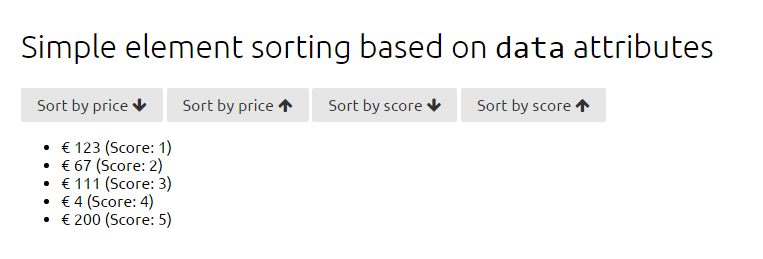
First, we need to create a simple list:
<ul class="sort-list">
    <li data-score="1" data-price="123">€ 123 (Score: 1)</li>
    <li data-score="5" data-price="67">€ 67 (Score: 2)</li>
    <li data-score="4" data-price="111">€ 111 (Score: 3)</li>
    <li data-score="3" data-price="4">€ 4 (Score: 4)</li>
    <li data-score="2" data-price="200">€ 200 (Score: 5)</li>
</ul>
Note the data-score and data-price attributes. You can add as many as you want, provided they have a numerical value.
Second, we need to create the sorting links/buttons:
<a href="#" class="sort1">Sort by price (descending)</a>
<a href="#" class="sort2">Sort by price (ascending)</a>
<a href="#" class="sort3">Sort by score (descending)</a>
<a href="#" class="sort4">Sort by score (ascending)</a>
The last step is to create the jQuery function:
function sortMeBy(arg, sel, elem, order) {
    var $selector = $(sel),
        $element = $selector.children(elem);

    $element.sort(function(a, b) {
        var an = parseInt(a.getAttribute(arg)),
        bn = parseInt(b.getAttribute(arg));

        if (order == 'asc') {
            if (an > bn)
                return 1;
            if (an < bn)
                return -1;
        } else if (order == 'desc') {
            if (an < bn)
                return 1;
            if (an > bn)
                return -1;
        }
        return 0;
    });

    $element.detach().appendTo($selector);
}

$(document).on('click', '.sort1', function() {
    sortMeBy('data-price', 'ul.sort-list', 'li', 'desc');
});
$(document).on('click', '.sort2', function() {
    sortMeBy('data-price', 'ul.sort-list', 'li', 'asc');
});
$(document).on('click', '.sort3', function() {
    sortMeBy('data-score', 'ul.sort-list', 'li', 'desc');
});
$(document).on('click', '.sort4', function() {
    sortMeBy('data-score', 'ul.sort-list', 'li', 'asc');
});
Notice the code above has one function and four click triggers. Add more triggers based on how many sorting buttons you have. Make sure to match the element class and the sorting order (ascending or descending)
See our demo on Codepen!
jQuery – Order elements based on data attributes
Sometimes, you need to sort div elements based on a custom order parameter. The parameter may come from a database or from user input and you need to resort the elements when displaying them.
Let’s suppose we have the following HTML structure:
<div class="grid">
    <div class="grid-box" data-order="2">
        <!-- content here -->
    </div>

    <div class="grid-box" data-order="1">
        <!-- content here -->
    </div>

    <div class="grid-box" data-order="3">
        <!-- content here -->
    </div>
</div>
Notice how the display order is incorrect now. Using jQuery, you can easily reorder everything on runtime:
$(document).ready(function() {
    var $wrapper = $('.grid');

    $wrapper.find('.grid-box').sort(function(a, b) {
        return +a.dataset.order - +b.dataset.order;
    }).appendTo($wrapper);
});
Enjoy!
Old school image preload with jQuery
Preloading images with jQuery, option 1.
$(document).ready(function() {
   // preload images // create image array
   var pics = [];

   // preload images // main function
   function preload() {
      for(i = 0; i < arguments.length; i++) {
      pics[i] = new Image();
      pics[i].src = arguments[i];
   }
}

// preload images // do it!
preload(
   "slides/birmingham.jpg",
   "slides/manchester.jpg",
   "slides/liverpool.jpg",
   "slides/paris.jpg",
   "slides/edinburgh.jpg",
   "slides/london.jpg",
   "slides/dublin.jpg"
);
Preloading images with jQuery, option 2.
// preload images // main function
function preloadImage(url) {
   var img = new Image();
   img.src = url;
}

// preload images // do it!
preloadImage("slides/birmingham.jpg");
preloadImage("slides/manchester.jpg");
preloadImage("slides/liverpool.jpg");
preloadImage("slides/paris.jpg");
preloadImage("slides/edinburgh.jpg");
preloadImage("slides/london.jpg");
preloadImage("slides/dublin.jpg");
jQuery ul/li sorting (random code snippet)
A recent project of mine required sorting an existing ul/li list. The only way to do it, without interacting with the PHP code was a jQuery snippet. See it below (there is no additional information or documentation available).
// Sort destinations alphabetically // Ciprian
$(window).on('load', function(){
    var groupedLiElements = $('#destinations .list:nth-child(1) ul.grouped').children('li').length;
    for(i=0; i<groupedLiElements; i++) {
        var items = $('#destinations .list:nth-child(1) ul.grouped li:nth-child(' + i + ') ul li').get();
        items.sort(function(a,b){
            var keyA = $(a).text();
            var keyB = $(b).text();

            if(keyA < keyB) return -1;
            if(keyA > keyB) return 1;
            return 0;
        });
        var ul = $('#destinations .list:nth-child(1) ul.grouped li:nth-child(' + i + ') ul');
        $.each(items, function(i, li){
            ul.append(li);
        });
    }

    var items = $('#destinations .list:nth-child(2) ul.simple li').get();
    items.sort(function(a,b){
        var keyA = $(a).text();
        var keyB = $(b).text();

        if(keyA < keyB) return -1;
        if(keyA > keyB) return 1;
        return 0;
    });
    var ul = $('#destinations .list:nth-child(2) ul.simple');
    $.each(items, function(i, li){
       ul.append(li);
    });

    var items = $('#destinations .list:nth-child(3) ul.simple > li').get();
    items.sort(function(a,b){
        var keyA = $(a).text();
        var keyB = $(b).text();

        if(keyA < keyB) return -1;
        if(keyA > keyB) return 1;
        return 0;
    });
    var ul = $('#destinations .list:nth-child(3) ul.simple');
    $.each(items, function(i, li){
        ul.append(li);
    });
});
Simple jQuery accordion UL/LI menu
If you want to turn a vertical ul/li menu with submenus into an accordion, just use this jQuery code and change the menu ID accordingly.
This is the simplest jQuery accordion for use with ul/li lists. Just bring your own CSS styling.
The code works with unstyled ul/li lists, just to make an idea of how it works. You can use it for vertical menus, tree view menus, even WordPress-like dashboard menus.
Don’t forget to replace $ with jQuery if using in WordPress.
$(document).ready(function() {
    $('#accordion li ul').hide();

    $('#accordion li a').click(function(){
        if($(this).next('ul:visible').length) {
            $(this).next('ul:visible').slideUp();
        } else {
            $('#accordion li ul:visible').slideUp();
            $(this).next('ul').slideToggle('normal');
        }
        return false;
    });
});
jQuery autocomplete/autosuggest from MySQL database
I just uploaded my gbAutocomplete script to GitHub:
https://github.com/wolffe/_backup/tree/master/gbAutocomplete
gbAutocomplete is a simple jQuery plugin useful for search autocomplete from MySQL database.
jQuery/CSS fullscreen background slider
This is a simple jQuery/CSS fullscreen background slider, compatible with all modern browsers. IE 8 and below were not invited to this party.
jQuery code:
var i = 0;

setInterval(function() {
   // add total number of images (all cases start from 0)
   switch(i++%4) {
      case 0:
         $('html').css({
            'background' : 'url("slides/birmingham.jpg") no-repeat center center fixed',
            '-webkit-background-size' : 'cover',
            '-moz-background-size' : 'cover',
            '-o-background-size' : 'cover',
            'background-size' : 'cover'
         });
         break;

      case 1:
         $('html').css({
            'background' : 'url("slides/manchester.jpg") no-repeat center center fixed',
            '-webkit-background-size' : 'cover',
            '-moz-background-size' : 'cover',
            '-o-background-size' : 'cover',
            'background-size' : 'cover'
         });
         break;

      case 2:
         $('html').css({
            'background' : 'url("slides/liverpool.jpg") no-repeat center center fixed',
            '-webkit-background-size' : 'cover',
            '-moz-background-size' : 'cover',
            '-o-background-size' : 'cover',
            'background-size' : 'cover'
         });
         break;

      case 3:
         $('html').css({
            'background' : 'url("slides/london.jpg") no-repeat center center fixed',
            '-webkit-background-size' : 'cover',
            '-moz-background-size' : 'cover',
            '-o-background-size' : 'cover',
            'background-size' : 'cover'
         });
         break;
   }
}, 3000);
CSS code:
html {
   -webkit-background-size: cover;
   -moz-background-size: cover;
   -o-background-size: cover;
   background-size: cover;

   -moz-transition: background-image 0.8s ease-in-out;
   -webkit-transition: background-image 0.8s ease-in-out;
   -o-transition: background-image 0.8s ease-in-out;
   transition: background-image 0.8s ease-in-out;
}
body {
   overflow: hidden;

   -moz-transition: background-image 0.3s ease-in-out;
   -webkit-transition: background-image 0.3s ease-in-out;
   -o-transition: background-image 0.3s ease-in-out;
   transition: background-image 0.3s ease-in-out;
}
See a quick example here.
IP address geocoding using Google Maps and jQuery
Sometimes, just like myself with a recent project, you need to create a Google Map and populate it with markers extracted from an IP array. Hundreds, even thousands of IP addresses. In order to achieve this, you need to transform each IP to a location, then generate a marker and an info window.
Let’s get to work.
The code is split into 4 parts:
- The Google Maps script (note that you might need an API key)
- The IPMapper script (forked and modified for 2016)
- The array generation script
- The map element
Feel free to modify as required.
<script src="https://maps.google.com/maps/api/js"></script>
<script>
/*
 * IP Address Geocoding Using Google Maps
 * Forked from http://lab.abhinayrathore.com/ipmapper/ (June 13, 2012)
 *
 * Last Updated: May 17, 2016
 * @version 0.2.0
 */
var IPMapper = {
    map: null,
    mapTypeId: google.maps.MapTypeId.ROADMAP,
    latlngbound: null,
    infowindow: null,
    baseUrl: "https://freegeoip.io/json/",
    initializeMap: function(mapId) {
        IPMapper.latlngbound = new google.maps.LatLngBounds();
        var latlng = new google.maps.LatLng(0, 0);

        // Set map options
        var mapOptions = {
            zoom: 1,
            center: latlng,
            mapTypeId: IPMapper.mapTypeId
        }

        // Initialize map
        IPMapper.map = new google.maps.Map(document.getElementById(mapId), mapOptions);

        // Initialize info window
        IPMapper.infowindow = new google.maps.InfoWindow();

        // Info window close event
        google.maps.event.addListener(IPMapper.infowindow, 'closeclick', function() {
            IPMapper.map.fitBounds(IPMapper.latlngbound);
            IPMapper.map.panToBounds(IPMapper.latlngbound);
        });
    },
    addIPArray: function(ipArray) {
        // Get unique array elements
        ipArray = IPMapper.uniqueArray(ipArray);

        // Add a map marker for each IP address
        for (var i = 0; i < ipArray.length; i++) {
            IPMapper.addIPMarker(ipArray[i]);
        }
    },
    addIPMarker: function(ip) {
        // Validate IP address format
        // Note: You don't need this if you validate IP addresses server-side
        ipRegex = /^(([0-9]|[1-9][0-9]|1[0-9]{2}|2[0-4][0-9]|25[0-5])\.){3}([0-9]|[1-9][0-9]|1[0-9]{2}|2[0-4][0-9]|25[0-5])$/;
        if($.trim(ip) != '' && ipRegex.test(ip)) {
            var url = encodeURI(IPMapper.baseUrl + ip + "?callback=?"); // Geocoding URL
            $.getJSON(url, function(data) { // Get geocoded JSONP data
                if($.trim(data.latitude) != '' && data.latitude != '0' && !isNaN(data.latitude)) {
                    // Geocoding successful
                    var latitude = data.latitude;
                    var longitude = data.longitude;
                    var contentString = "";
                    $.each(data, function(key, val) {
                        contentString += '<b>' + key.toUpperCase().replace("_", " ") + ':</b> ' + val + '<br />';
                    });
                    var latlng = new google.maps.LatLng(latitude, longitude);
                    var marker = new google.maps.Marker({ // Create map marker
                        map: IPMapper.map,
                        draggable: false,
                        position: latlng
                    });
                    IPMapper.placeIPMarker(marker, latlng, contentString); // Place marker on map
                } else {
                    IPMapper.logError('IP Address geocoding failed!');
                    $.error('IP Address geocoding failed!');
                }
            });
        } else {
            IPMapper.logError('Invalid IP Address!');
            $.error('Invalid IP Address!');
        }
    },
    placeIPMarker: function(marker, latlng, contentString) { // Place marker on map
        marker.setPosition(latlng);
        google.maps.event.addListener(marker, 'click', function() {
            IPMapper.getIPInfoWindowEvent(marker, contentString);
        });
        IPMapper.latlngbound.extend(latlng);
        IPMapper.map.setCenter(IPMapper.latlngbound.getCenter());
        IPMapper.map.fitBounds(IPMapper.latlngbound);
    },
    getIPInfoWindowEvent: function(marker, contentString) { // Open marker info window
        IPMapper.infowindow.close();
        IPMapper.infowindow.setContent(contentString);
        IPMapper.infowindow.open(IPMapper.map, marker);
    },
    uniqueArray: function(inputArray) { // Return unique elements from array
        var a = [];
        for (var i=0; i<inputArray.length; i++) {
            for (var j=i+1; j<inputArray.length; j++) {
                if (inputArray[i] === inputArray[j]) {
                    j = ++i;
                }
            }
            a.push(inputArray[i]);
        }

        return a;
    },
    logError: function(error) {
        if (typeof console == 'object') {
            console.error(error);
        }
    }
}
</script>

<script>
$(function() {
    try {
        IPMapper.initializeMap("map");

        var ipArray = ["111.111.111.111", "222.222.222.222", "123.123.123.123"];
        IPMapper.addIPArray(ipArray);
    } catch(e) {
        //handle error
    }
});
</script>

<div id="map" style="height: 500px; margin: 24px 0; box-shadow: 0 2px 2px rgba(0, 0, 0, 0.15);"></div>
That’s it! If you need more than 10,000 queries per hour, you can cache the addresses in a database table and only fetch new IP addresses.
Notes and credits:
- IPMapper by Abhinay Rathore
- With freegeoip.io, you’re allowed up to 10,000 queries per hour by default. Once this limit is reached, all of your requests will result in HTTP 403, forbidden, until your quota is cleared.
jQuery $.browser replacement function (deprecated)
I’ve just fixed three sites by adding this jQuery code.
The reason is that the respective web sites had old (or deprecated) plugins which stopped working when jQuery got updated to 1.9.x. So I’ll share with you what I learned.
If you get a “browser” related error when using your Chrome Inspector, add the following code to your functions.js file:
var browser = {
        chrome: false,
        mozilla: false,
        opera: false,
        msie: false,
        safari: false
    };
    var sBrowser, sUsrAg = navigator.userAgent;
    if(sUsrAg.indexOf("Chrome") > -1) {
        browser.chrome = true;
    } else if (sUsrAg.indexOf("Safari") > -1) {
        browser.safari = true;
    } else if (sUsrAg.indexOf("Opera") > -1) {
        browser.opera = true;
    } else if (sUsrAg.indexOf("Firefox") > -1) {
        browser.mozilla = true;
    } else if (sUsrAg.indexOf("MSIE") > -1) {
        browser.msie = true;
    }
    //console.log(browser.msie);
Another approach would be to check for the error and fix it:
if(!$.browser){
    $.browser={chrome:false,mozilla:false,opera:false,msie:false,safari:false};
    var ua=navigator.userAgent;
        $.each($.browser,function(c,a){
        $.browser[c]=((new RegExp(c,'i').test(ua)))?true:false;
            if($.browser.mozilla && c =='mozilla'){$.browser.mozilla=((new RegExp('firefox','i').test(ua)))?true:false;};
            if($.browser.chrome && c =='safari'){$.browser.safari=false;};
        });
};
The following line was reported to fix “msie” related errors (also visible in Chrome’s Inspector):
jQuery.browser = jQuery.browser || {msie: navigator.userAgent.match(/msie/i) ? true : false};Based on which theme you’re using, or how the jQuery dependencies are loaded, you should load this code either before or after your main jQuery call. Just experiment.
Count DOM elements and display the total value
var mycount = $('.element').length;
$(".results").text(mycount);
Pad digits when you need to display numbers as 01, 02, 03 … 10, 11, 12, 13 … 99
function padDigits(number, digits) {
    return Array(Math.max(digits - String(number).length + 1, 0)).join(0) + number;
}
Remove duplicate elements (<option>) of a <select> dropdown
function removeSelectDuplicates($element) {
    var found = [];

    $($element + " option").each(function() {
        if($.inArray(this.value, found) != -1)
            $(this).remove();
        found.push(this.value);
    });
}
Sort elements (<option>) of a <select> dropdown, based on name (alphabetically)
function sortSelectA($element) {
    $($element).html($($element + ' option').sort(function(x, y) {
        return $(x).val() < $(y).val() ? -1 : 1;
    }));

    $($element).get(0).selectedIndex = 0;
}
Set/get cookies
function setCookie(name, value, days) {
    var expires = "";

    if (days) {
        var date = new Date();

        date.setDate(date.getDate() + days);
        expires = "; expires=" + date.toGMTString();
    }

    document.cookie = name + "=" + escape(value) + expires + "; path=/;";
}

function getCookie(name) {
    var dc = document.cookie;
    var begin = dc.indexOf(name);

    if (begin == -1) {
        return "";
    }

    var end = (dc.indexOf(";", begin) == -1) ? dc.length : dc.indexOf(";", begin);

    return unescape(dc.substring((begin + (name.length + 1)), end));
}
Use the cookie functions above to set cookies based on an input element
function setCustomCookie(type) {
    if(type == 'your-type-here') {
        setCookie('campaign', jQuery('#element').val(), 30);
    }
}
Highlight active menu item
var url = location.protocol + '//' + location.host + location.pathname;

$('ul.navigation li').children('a').each(function(){
    if(this.href == url) {
        $(this).parent().addClass('active');
    } else {
        $(this).parent().removeClass('active');
    }
});
Send Google Analytics event on element click
$(document).on('click', '.element', function() {
    // get a value from the element's data attribute
    var data_tracker = $(this).parent().attr('data-tracker');

    ga('send', {
        hitType: 'event',
        eventCategory: 'Your Category Here',
        eventAction: 'Click',
        eventLabel: data_tracker
    });
});
Get URL parameters
var getUrlParameter = function getUrlParameter(sParam) {
    var sPageURL = decodeURIComponent(window.location.search.substring(1)),
        sURLVariables = sPageURL.split('&'),
        sParameterName,
        i;

    for (i = 0; i < sURLVariables.length; i++) {
        sParameterName = sURLVariables[i].split('=');

        if (sParameterName[0] === sParam) {
            return sParameterName[1] === undefined ? true : sParameterName[1];
        }
    }
};

var sort = getUrlParameter('your-parameter-1');
var range = getUrlParameter('your-parameter-2');
Animate expanding height of a textarea element on focus and collapsing it when clicking a button
$("textarea").focus(function(){
    $(this).animate({"height": "300px",}, "fast");

    return false;
});
$("#close").click(function(){
    $("textarea").animate({"height": "20px",}, "fast");

    return false;
});
Text-only tooltip based on the title attribute
$('.hasTooltip').hover(function() {
    var title = $(this).attr('title');

    $(this).data('tipText', title).removeAttr('title');
    $('<p class="tooltip"></p>').text(title).appendTo('body').fadeIn('slow');
}, function() {
    $(this).attr('title', $(this).data('tipText'));
    $('.tooltip').remove();
}).mousemove(function(e) {
    var mousex = e.pageX + 20;
    var mousey = e.pageY + 10;
    $('.tooltip').css({ top: mousey, left: mousex })
});
Zebra table with one jQuery line
$('table tr:odd').addClass('odd');Enjoy!
Get the background image width inside a variable size element
My latest UI challenge was to position an element inside a variable width element, relatively positioned. The element had a background image which did or did not cover the entire width. White space was added to the left and right of the image.
My task was to get the background image width, get the parent element width, subtract the image width and divide it by 2 (left an right). Then, absolutely position the overlay element.
To further add to this challenge, the parent element was a slider. Slides had background images with various sizes, so I had to constantly check for the width, without allowing the overlaid element to constantly jump.
Got it so far?
I got jQuery to get the background image width with the following function:
<script>
function getImageWidth(which) {
    var img = new Image;
    img.src = $(which).css('background-image').replace(/url\(|\)$/ig, '');

    return img.width;
}
</script>
Then I checked for DOM ready and applied a CSS rule for right positioning:
<script>
$(window).load(function(){
    $('.thesticker').show(); // was previously hidden
    $('.thesticker').css('right', ($('#gallery').width() - getImageWidth('#gallery'))/2);
    setInterval(function() {
        var w = getImageWidth('#gallery');
        if($('.load').is(':visible')) { // this is the preloader spinner element // I'm using it to get the slide change
            $('.thesticker').hide();
        }
        else {
            $('.thesticker').css('right', ($('#gallery').width() - getImageWidth('#gallery'))/2);
            $('.thesticker').show();
        }
    }, 0);
});
<script>
My overlaid element is .thesticker and the parent element is #gallery. I am checking every millisecond for a slide change (not good from a performance point of view, it can be optimized by injecting the check inside the slider script).
Poor man’s lazy loading
We all know that images tend to load quite slowly, especially when using AJAX pagination. This was my case, and because it was a backoffice system, I decided to go with small script and load the images after the DOM was ready. This way, I could apply some smart CSS styling.
This is the main function:
function loadVisibleImages() {
    jQuery('img[data-src]').each(function() {
        this.src = jQuery(this).data('src');
    });
}
This is how I called it:
jQuery(document).ready(function() {
    loadVisibleImages();
});
And, finally, this is how I called the images:
<img src="placeholder.png" data-src="your-image.jpg" alt="">
placeholder.png could be a transparent PNG with a CSS-styled background, such as a rotating preloader icon or image. It could also be a black image with a white text saying “Loading…”, or even a progress indicator icon.
Sticky navigation bar
This JavaScript will make one element’s position fixed once the visitor scrolls below its original position.
/*
 * Pass in the ID of an element whose position you want fixed once the visitor scrolls past the element's initial position.  If the visitor scrolls up again, the element will take on its original position.
 */

var makeSticky = function(id) {
    var menuOffset = document.getElementById(id).offsetTop;
    var docScroll = $(document).scrollTop();
    $(document).bind('ready scroll', function() {
        docScroll = $(document).scrollTop();
        if (docScroll >= menuOffset) {
            $('#'+id).css({'position':'fixed', 'top':'0', 'z-index': '1000'});
        } else {
            $('#'+id).css({'position':'initial','z-index':'0'});
        }
    });
}

// Usage example
makeSticky('mainNavBar');
Prevent double clicking anywhere in the DOM
This code disables double clicking anywhere in the DOM. It might be useful for buttons or form actions.
$(document).ready(function() {
    $(document).dblclick(function(e) {
        e.preventDefault();
        console.log('Handler for .dblclick() called and ignored.');
    });
});