The WooCommerce Conditional Blocks plugin lets you easily configure alerts, messages, advertisements and additional product content based on a set of rules that you configure to target specific conditions throughout your store.
Effortlessly display blocks across your store based on customizable rules and conditions.
This plugin enables dynamic block placement throughout your store, tailored to your shoppers’ actions and behaviour. Whether it’s displaying messages, promotions, reminders, or custom content, the plugin’s powerful rule builder lets you adapt your store to meet diverse scenarios. For example, show specific content when customers add items to their cart, browse certain product categories, or view products in a defined price range or stock status.
Installation
- Download the .zip file from your getButterfly account.
- Go to the WordPress Dashboard → Plugins → Add New and Upload Plugin with the file you downloaded with Choose File.
- Install Now and Activate the extension.
Setup and Configuration
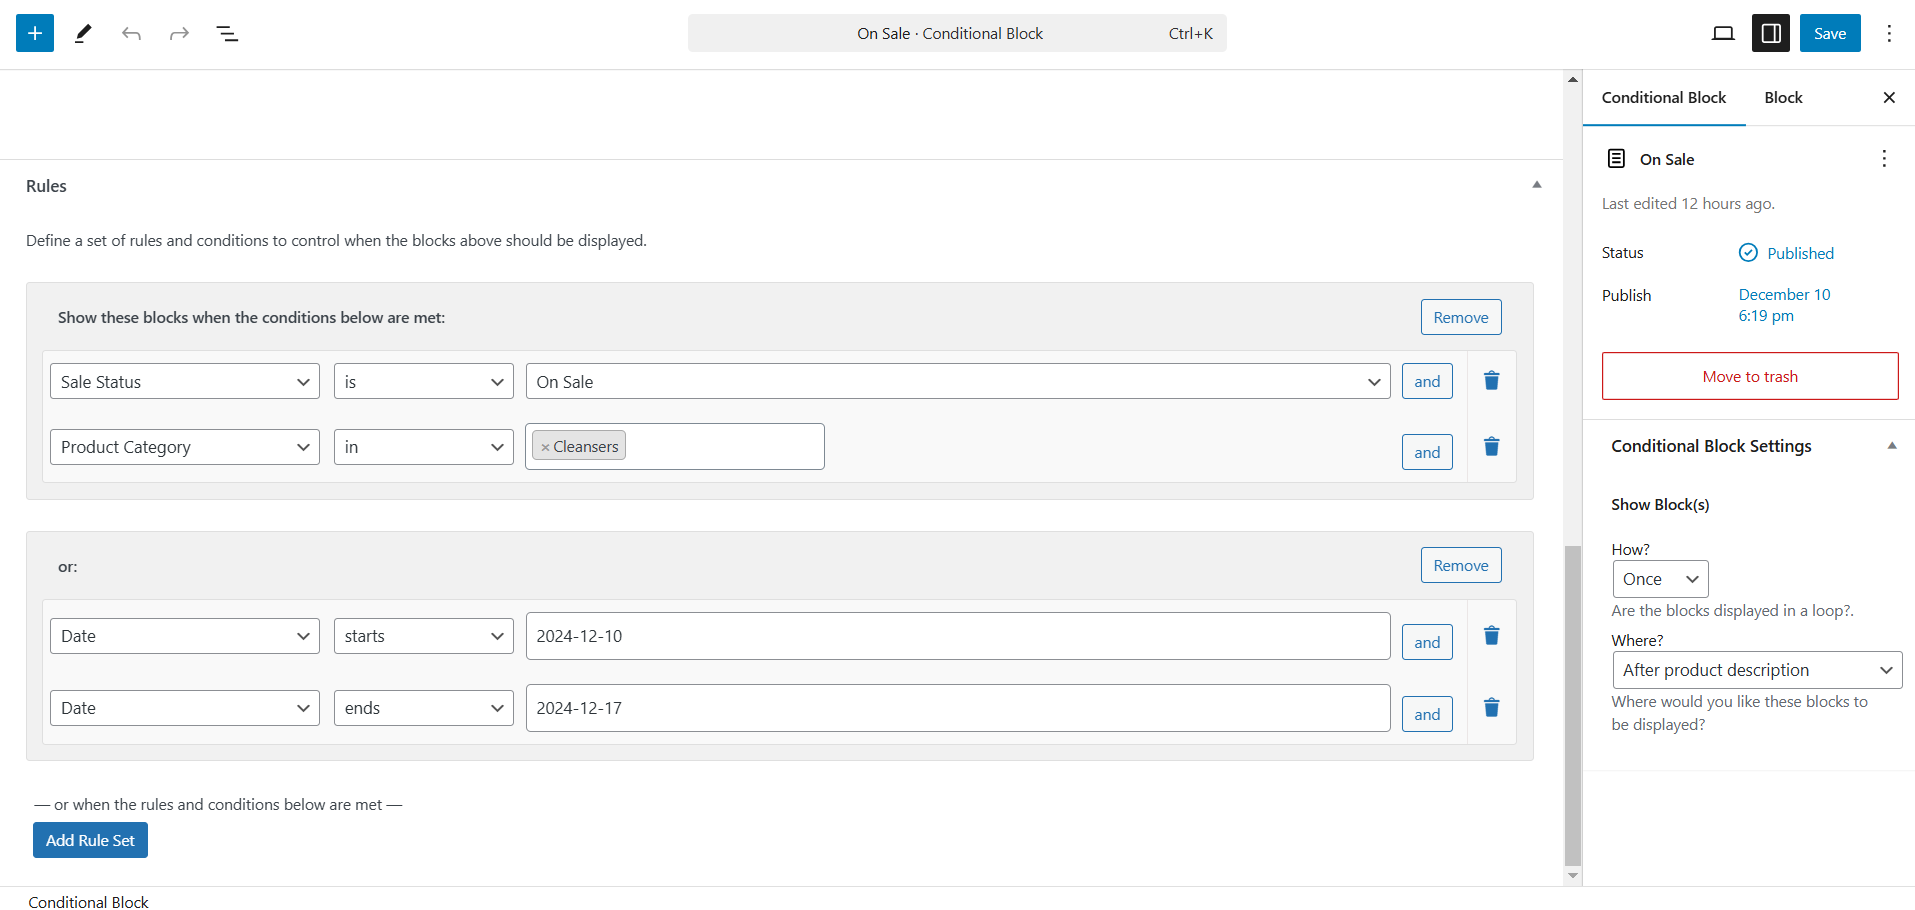
The first step in creating conditional blocks is to create a “Conditional Block” with the content of your choosing. Conditional blocks are created from the WooCommerce Menu → Conditional Blocks. The interface is the same as creating a new post or page. Choose “Add New” to get started writing your conditional block.
Key Features
- Highlight upcoming sales with a message on products that are about to go on sale.
- Notify customers about low-stock or expiring products.
- Show personalized messages to specific users or user roles.
- Display cart-based messages when certain products are added.
- Recommend complementary products by displaying messages on related items in the cart.
- Create dynamic pricing tables aligned with your advanced pricing rules.
Dynamic Rule Builder
At the core of the Conditional Blocks for WooCommerce is an intuitive rule builder. It enables you to define simple conditions, such as promoting a sale for a product category, or more complex scenarios involving multiple criteria.
The plugin includes a comprehensive list of predefined criteria to make rule creation quick and flexible. Choose from WooCommerce’s hooks to place content without needing deep technical knowledge. Additionally, for custom use cases, you can specify your own filters or use template tags directly in your theme.
Examples
- Membership Perks: Show exclusive content to specific user roles or members.
- Category-based Content: Easily display content across all products in a specific category.
- Stock Promotions: Encourage purchases by alerting shoppers to items running low on stock.
Available Criteria
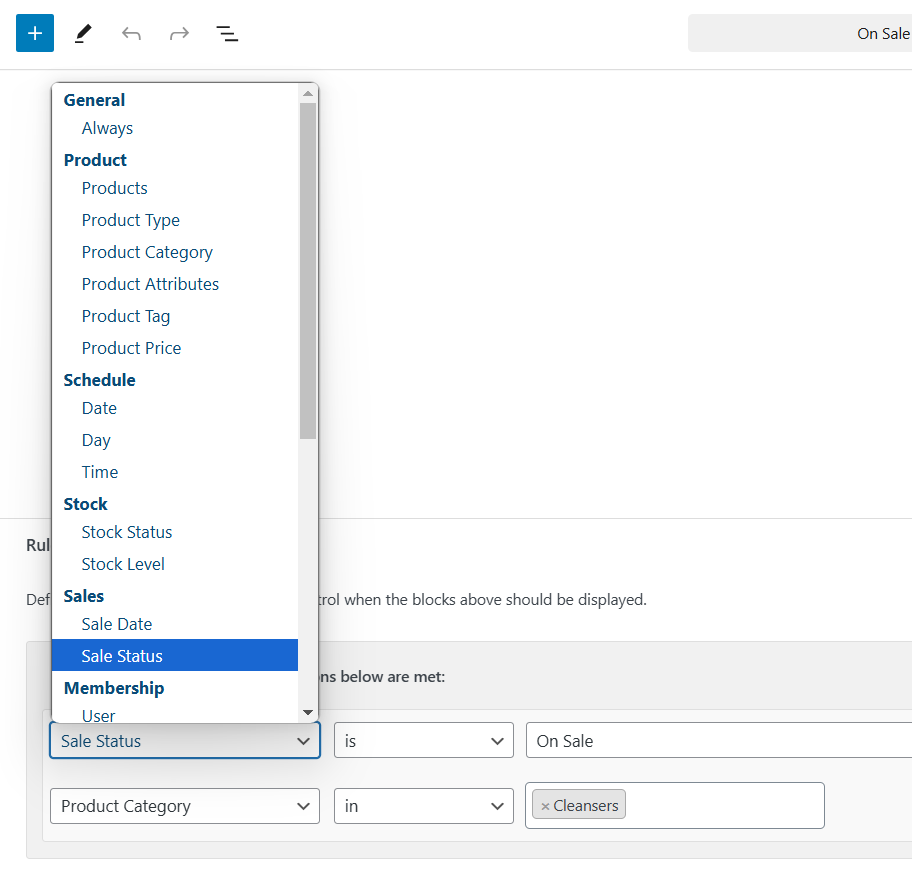
Product Rules
- Specific Products: Target individual products.
- Product Types: Show content on all products of a certain type.
- Categories: Display messages on products within selected categories.
- Attributes: Highlight products with specific attributes.
- Price Range: Tailor content for products within defined price ranges.
Stock Rules
- Stock Status: Show content based on in-stock or out-of-stock status.
- Stock Levels: Display messages for products with inventory in specific ranges.
Sales Rules
- Sale Dates: Show content during active sale periods.
- Sale Status: Highlight products that are currently on sale.
General Rules
- User Roles: Display content to specific user roles (e.g., Members, Administrators).
- Specific Users: Target content for specific individuals.
- Cart Rules:
- Trigger messages when certain products or quantities are in the cart.
- Highlight deals for products from specific categories in the cart.
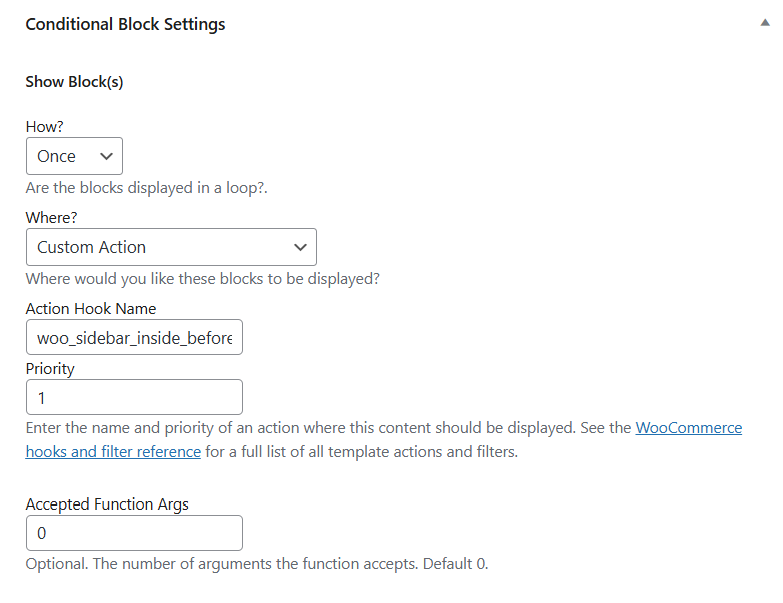
In the following example, we are choosing to display the content in the sidebar, by hooking into the woo_sidebar_inside_before.
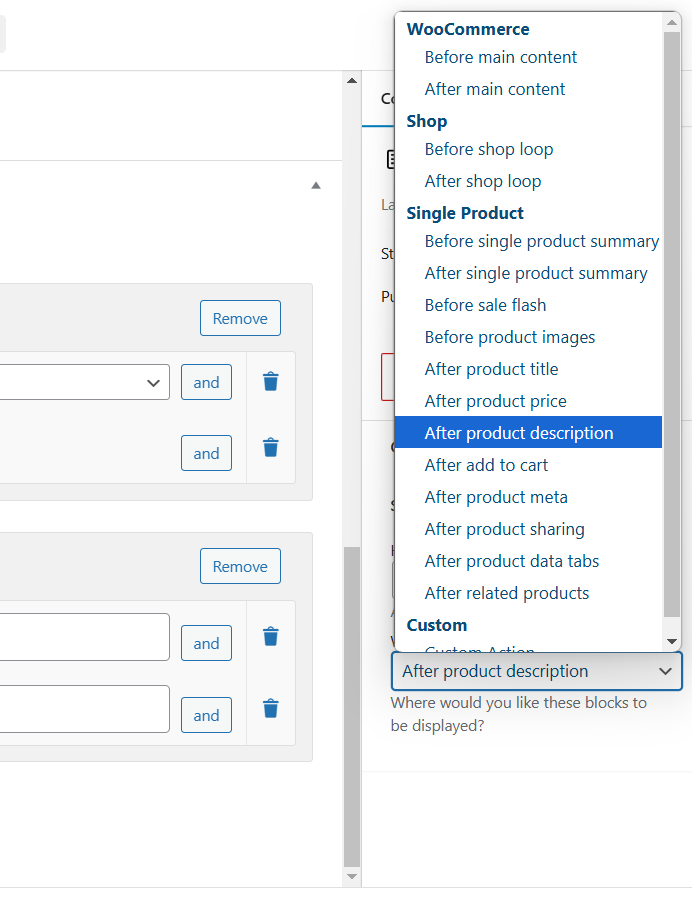
Output Location Configuration
Use the Output Settings location to configure where in your theme the content will display. A predefined set of hooks and actions are provided. See the WooCommerce action and filter reference for an idea of where these hooks are triggered. You can also enter in your own hook and priority to get the content to display in any arbitrary location. To enter your own action, select “Custom” and enter the name of the action in the box provided.


