Here’s my steps to submit a patch to WordPress code.
The whole process of editing WordPress core and submitting a patch can be daunting, to say the least, so I wanted to document how I did it here, for you to use.
Table of Contents
The first thing you’ll need is a Subversion client that supports creating patches. WordPress suggest 🐢 TortoiseSVN for Windows (free).
🐢 Install TortoiseSVN
So, I installed TortoiseSVN. Next, you’ll have to have a local web server installed on your machine so that you can run and test WordPress. You can also use an online development server, if that’s your thing.
👩💻 Install WordPress
Download/Checkout the Source Code
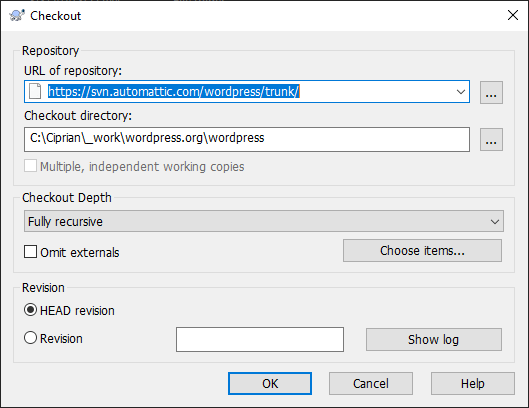
Now, TortoiseSVN is set up and ready for you to download the source code from WordPress. Right-click on your wordpress folder and choose SVN Checkout…. In the dialogue window that pops up, choose https://svn.automattic.com/wordpress/trunk/ as the URL of repository and click OK. TortoiseSVN will then start downloading the entire WordPress codebase, which will take a minute or two. Once it’s complete, you’ll notice the familiar WordPress file structure inside your wordpress folder.
Get WordPress Up and Running
Synchronize this folder with your local server and install WordPress.
Once you’ve done that, be sure to set WP_DEBUG and WP_DEBUG_DISPLAY constants to true in wp-config.php, since you’ll want to be notified of any issues.
Now you’re in a position to edit any file you like in WordPress. This depends on what issue you’re trying to patch, or what improvement you’re trying to make, so this is where you take over for a while. Always test, test, test.
Keep the Source Code Updated
Unless you make your edits immediately after you download the source, you’ll want to update your source code to make sure that you’re editing the most recent files. Periodically, and before doing any code changes, go to your wordpress folder, right-click and select SVN Update.
🩹 Create Your Patch
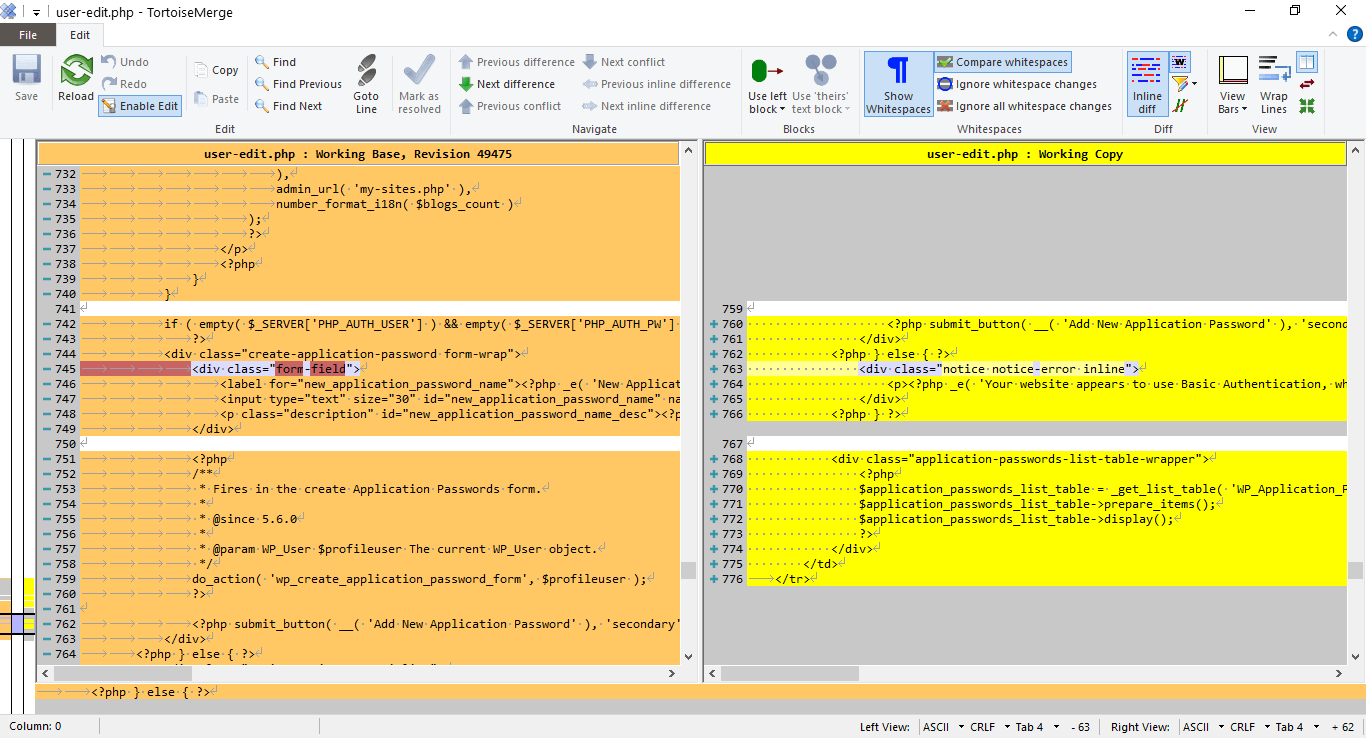
Double-check your changes by diffing the file (right-click on each file, TortoiseSVN -> Diff and check all lines for any missing tags or brackets and general syntax):
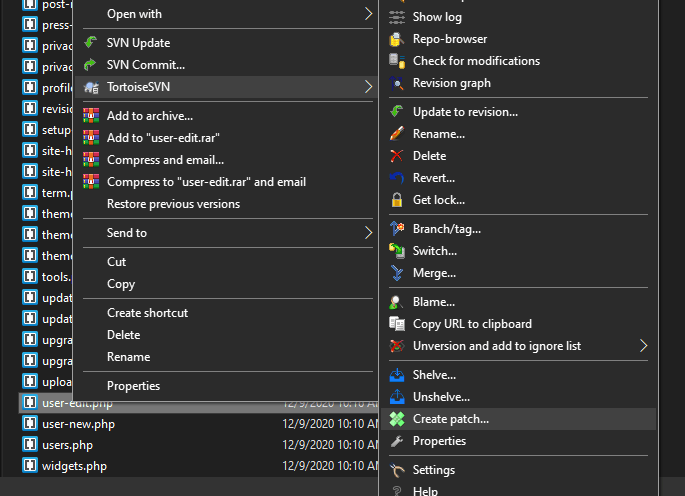
Once you’ve made all of the edits that you want, you’ve tested it and you’re ready to submit the patch for testing and review, right-click on the wordpress folder (or on the file, if it’s only one) and select Create patch….
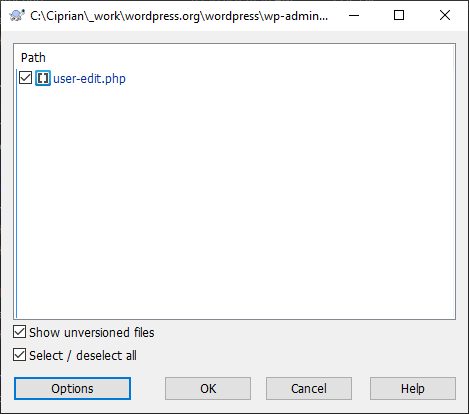
The subsequent window will show a list of all files that have changed since you updated the source code, which should essentially amount to the files that you changed. If others appear in the list, which do not apply to the edits you made (such as wp-config.php or any development environment files), you can uncheck those to make sure that they are not included in your patch.
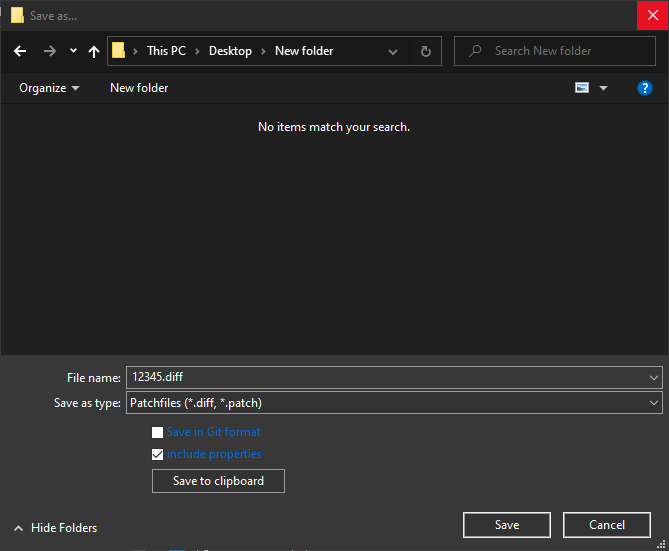
Once you have selected all the right files, click on OK and select where to save your patch file. TortoiseSVN will then open the patch file, which essentially shows the differences between the original files and how you added to/modified them. Save the file as 12345.diff where 12345 is the ticket number in WordPress Trac.
🚚 Submit Your Patch
🦸♂️🦸
Congratulations! You have created your first patch!
Now you need to submit it for review by the core developers.
Before submitting the bug and the patch (and even before coding), search existing tickets to make sure that someone hasn’t already reported the issue you’re patching, or suggested the feature you’re adding.
If they have, review their ticket and see if your patch will solve the issue they have described.
If you can’t find a ticket that matches your feature suggestion or bug, create a new ticket and explain in detail the feature/bug.
Note: Do not report potential security vulnerabilities in WordPress in Trac as you will be telling the whole world how to exploit the loophole. email WordPress directly at security@wordpress.org.
Each ticket has the ability to attach files to it, which is where you need to upload the patch file you just created.
Once you have updated the ticket with your patch, stay updated on the progress of your ticket. If your patch works as expected and fixes the issue or implements a required feature, it will be reviewed and committed. If not, you will be required to add more code, refactor your code or test it more.
Good luck!
