Part 7 of the HTML5 Canvas series — see the full series.
Table of Contents
Canvas is a non-retained drawing surface. This means that the Canvas does not keep track of the drawing operations performed on it, it captures only the end result of these operations – a set of multicolored pixels that make up its content.
For example, if you draw a red square in the center of the Canvas using the stroke() or fill() method, once that method completes, the square becomes nothing more than a block of red pixels. It may look like a square to you, but the Canvas has no information about it.
This approach allows you to make the drawing process fast, but it also complicates the task of creating interactive graphics. Let’s say that we need to develop a smarter version of the paint program we covered in the “Creating a simple paint program” article. In particular, we want to be able to draw rectangles in addition to lines. (But it’s still easy!)
Moreover, we want to not only draw rectangles, but also select drawn rectangles, drag them to a new location, change their size, color, and so on. But in order to realize all these possibilities, we need to solve several problems. First, how do we know that the user has clicked on the rectangle? Then, how can we find out all the details about this rectangle – its coordinates, size, outline and fill color? Finally, how do we find out the details about all the other shapes on the Canvas? What do we need to know if we want to change the rectangle and update the Canvas?
To solve all these problems and make the Canvas interactive, we need to keep track of all the objects that are drawn on it. Then, when the user clicks somewhere on the Canvas, you need to determine if he hit one of the shapes. This process is called hit-testing. If we can solve these two tasks, the rest – modifying the shape and updating the Canvas accordingly – will be easy.
Tracking Drawn Content
In order to change and update the content of the Canvas, we need to have all the information about this content. Take, for example, the interactive circle-drawing program whose window is shown in the figure:
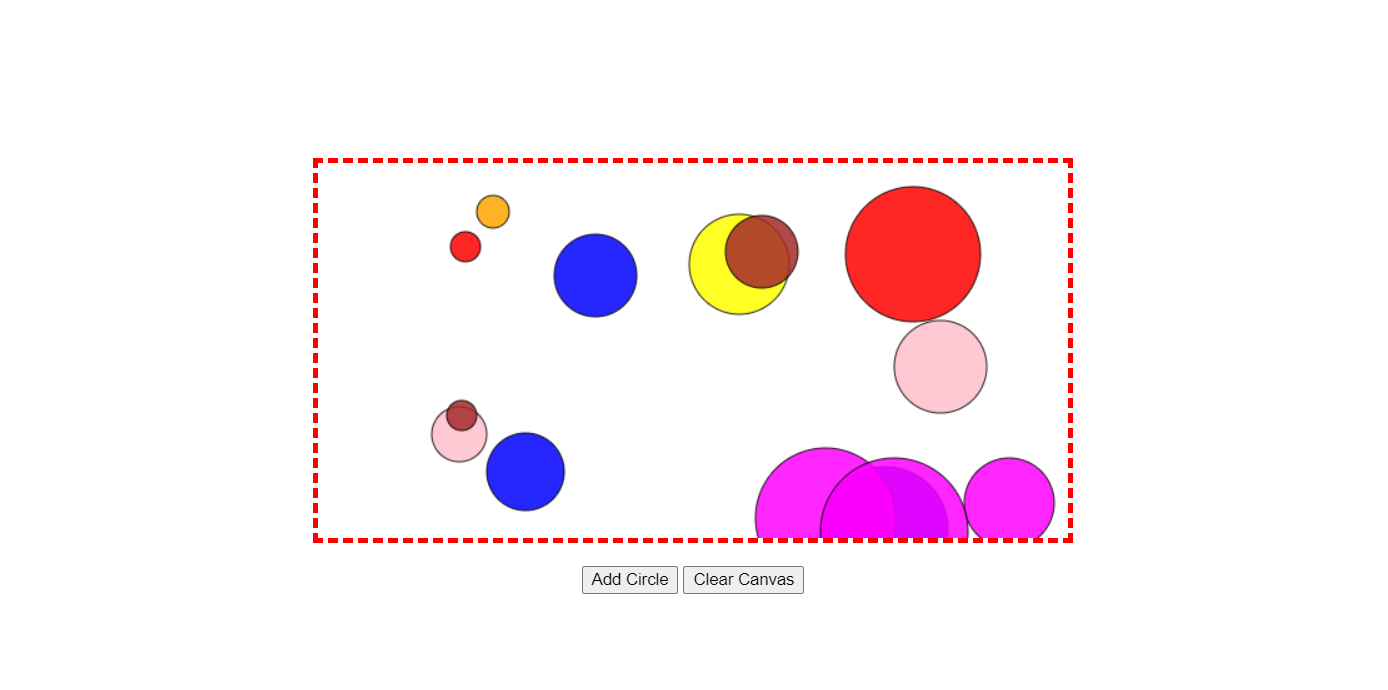
For simplicity, the program draws only individual circles of different sizes and colors. To keep track of an individual circle, we need to know its position on the Canvas (i.e., its center coordinates), its radius, and its fill color. Instead of creating several dozen variables to store all this information, you need to store four types of data in one compact package. Such a package would be a custom object.
Consider creating a custom object in case you’ve never had to follow this standard procedure before. First, a function is created with a name that reflects the type of our object. For example, a function to create a custom object for drawing a circle could be called Circle():
function Circle() {
}
We want our object to be able to store data. This is done by creating properties with the this keyword. For example, to define the radius property of a circle object, the this.radius expression is assigned a value.
You can go further and pass parameters to the Circle() function. Thus, creating a circle object and setting its properties is done in one step. The following code is an example of a Circle() function that allows you to set parameters:
function Circle(x, y, radius, color) {
    this.x = x;
    this.y = y;
    this.radius = radius;
    this.color = color;
    this.isSelected = false;
}
The isSelected property takes the value true or false. When the user clicks on the circle, the isSelected property is set to true so that the drawing code knows to draw a different path for the circle.
A circle object can be created using this version of the Circle() function with the following code:
let myCircle = new Circle(0, 0, 20, 'red');The whole idea of creating a circle drawing program is to be able to draw not just one circle, but as many as you like. This means that just one circle object won’t be enough, and we need to create an array to hold all the circles. In this example, this task is performed by the following global variable:
let circles = [];The rest of the code is nothing complicated. When the user presses the “Add Circle” button to create a new circle, the addRandomCircle() function is called, which creates a new circle of random size and color at an arbitrary location on the Canvas:
function addRandomCircle() {
    let radius = randomFromTo(10, 60);
    let x = randomFromTo(0, canvas.width);
    let y = randomFromTo(0, canvas.height);

    let colors = ["green", "blue", "red", "yellow", "magenta", "orange", "brown", "purple", "pink"];
    let color = colors[randomFromTo(0, 8)];

    let circle = new Circle(x, y, radius, color);

    circles.push(circle);

    drawCircles();
}
The code uses a custom function randomFromTo() that generates random numbers in a given range:
function randomFromTo(from, to) {
    return Math.floor(Math.random() * (to - from + 1) + from);
}
The last step in this sequence is to actually draw the current collection of circles on the Canvas. To do this, after creating a new circle, the addRandomCircle() function calls the drawCircles() function, which in turn iterates over the array of circles using the following code:
function drawCircles() {
    context.clearRect(0, 0, canvas.width, canvas.height);

    for (let i = 0; i < circles.length; i++) {
        let circle = circles[i];

        context.globalAlpha = 0.85;
        context.beginPath();
        context.arc(circle.x, circle.y, circle.radius, 0, Math.PI * 2);
        context.fillStyle = circle.color;
        context.strokeStyle = 'black';

        if (circle.isSelected) {
            context.lineWidth = 5;
        } else {
            context.lineWidth = 1;
        }

        context.fill();
        context.stroke();
    }
}
The clearCanvas() function clears the Canvas by calling drawCircles() with the circles[] array set to zero:
function clearCanvas() {
    circles = [];

    drawCircles();
}
To use the addRandomCircle() and clearCanvas() functions, add two buttons to the markup that handle the onclick event:
<div class="CanvasContainer">
     <canvas id="my-canvas" width="500" height="340"></canvas>
</div>
<div>
     <button onclick="addRandomCircle()">Add Circle</button>
     <button onclick="clearCanvas()">Clear Canvas</button>
</div>
The circles we’ve drawn aren’t interactive yet, but the page already contains the all-important structure to keep track of each circle we draw. That is, although the Canvas is still just a block of colored pixels, the code knows the exact location of the set of circles contained in the Canvas, meaning that it can manipulate those circles at any time.
This article is part of the JavaScript Canvas series where I post experiments, JavaScript generative art, visualizations, Canvas animations, code snippets and how-to’s.
In the next section, we’ll look at how to use this system to allow the user to select a circle.
Hit Testing by Comparing Coordinates
When working with interactive shapes, you almost certainly need to perform a hit test. In our circle drawing program, we need to check if the point where the mouse was clicked is with the circle or with empty Canvas space.
When performing such a check for each figure, we need to calculate whether the point being checked is not inside the limits of this figure. If it is, then the point that was clicked with the mouse fell into this figure. Conceptually, this is a linear process, but the details of its implementation – the calculations to determine whether a given shape was clicked – can get pretty clumsy.
The first thing we need is a loop to iterate through all the shapes. This loop should iterate over the objects in the array in reverse order – from the end to the beginning. The test starts at the end element of the array (whose index is the total number of objects in the array minus one) and counts backwards to the first element (whose index is 0).
There is a reason for this reverse direction of the cycle. In particular, in most applications (including our circle-drawing program), objects are displayed on the Canvas in the order they are stored in the array. This means that objects drawn later are superimposed on earlier objects, and when objects are overlaid, the object that is on top gets clicked.
To determine if the click hit a shape, we need to apply some maths. In the case of a circle, we need to calculate the distance in a straight line from the clicked point to the center of the circle. If this distance is less than or equal to the radius of the circle, then that point is within the circle.
In this example, the web page handles the Canvas’s onclick event to check if the clicked point hits the circle. Clicking on the Canvas activates the canvasClick() function, which calculates the coordinates of the clicked point and then checks to see if they are inside any circle:
window.onload = () => {
    canvas = document.getElementById(my-canvas');
    context = canvas.getContext('2d');

    canvas.onclick = canvasClick;
}

...

let previousSelectedCircle;

function canvasClick(e) {
    let clickX = e.pageX - canvas.offsetLeft;
    let clickY = e.pageY - canvas.offsetTop;

    for (let i = circles.length - 1; i >= 0; i--) {
        let circle = circles[i];

        let distanceFromCenter = Math.sqrt(Math.pow(circle.x - clickX, 2) + Math.pow(circle.y - clickY, 2));

        if (distanceFromCenter <= circle.radius) {
            if (previousSelectedCircle != null) {
                previousSelectedCircle.isSelected = false;
            }

            previousSelectedCircle = circle;

            circle.isSelected = true;
            drawCircles();

            return;
        }
    }
}
This example can be improved in many ways and made more intelligent. For example, you can add a toolbar with commands to edit the selected circle, change its color, or remove it from the Canvas. Or you can add the ability to drag the selected circle from one place on the Canvas to another. To do this, simply track the Canvas for the onMouseMove event, change the circle’s coordinates accordingly, and then call the drawCircles() function to update the Canvas with the circle in the new location:
window.onload = () => {
    canvas = document.getElementById('my-canvas');
    context = canvas.getContext('2d');

    canvas.onmousedown = canvasClick;
    canvas.onmouseup = stopDragging;
    canvas.onmouseout = stopDragging;
    canvas.onmousemove = dragCircle;
}

...

function canvasClick(e) {

    ...

    if (distanceFromCenter <= circle.radius) {
        ...

        isDragging = true;
        return;
    }
}

let isDragging = false;

function stopDragging() {
    isDragging = false;
}

function dragCircle(e) {
    if (isDragging == true) {
        if (previousSelectedCircle != null) {
            let x = e.pageX - canvas.offsetLeft;
            let y = e.pageY - canvas.offsetTop;

            previousSelectedCircle.x = x;
            previousSelectedCircle.y = y;

            drawCircles();
        }
    }
}
Summing up, we can say the following: tracking drawing objects provides the developer with unlimited flexibility for editing and displaying them in the future.
← Previous: Inserting images and text | Next: A big ball of particles →