Part 4 of the HTML5 Canvas series — see the full series.
Table of Contents
So far, we’ve been using solid colors to draw and fill elements on the Canvas. And while there is certainly nothing wrong with that, artistic minds will be happy to know that the possibilities of Canvas are not limited to solid colors.
One example of such a design would be the ability for any element on the Canvas to cast an artistically designed shadow. Another example would be filling a shape with a pattern of repeating images. But almost certainly the most sophisticated drawing option is gradients, whereby two or more colors can be blended together to create kaleidoscopic patterns.
In the following sections, we’ll learn how to use these features simply by setting various properties of the Canvas’s drawing context.
Creating Shadows
One of the useful features of the Canvas is to add shadows behind any drawn image. Shadows can be applied equally well to shapes, images, and text. One interesting feature is the interaction of shadows with images with transparent backgrounds. Shadows also work well with text, allowing you to create a variety of effects controlled by setting the appropriate parameters.
Essentially, a shadow is a blurry version of the original image — a line, shape, image, or text. The appearance of the shadow is controlled by setting the properties of the drawing context (listed in the table):
| Property | Description |
|---|---|
shadowColor | Sets the color of the shadow. You can set the shadow to black or colored, but it’s usually best to make it half gray. Another good approach is to use translucent shadows so you can see the content underneath. You can disable shadows by setting the alpha attribute of the shadowColor property to zero |
shadowBlur | Sets the degree of shadow blur. A value of zero for this property defines a crisp, hard shadow that looks like the silhouette of the original image. And a value of 20 gives a blurry haze shadow, and you can set it to an even higher value. Most people find that a slightly blurred shadow looks best (shadowBlur value around 3) |
shadowOffsetX and shadowOffsetY | Determine the position of the shadow relative to the content it belongs to. For example, if you set each property to 5, the shadow will be positioned 5 pixels to the right and 5 pixels down from the original content. Negative values shift the shadow in the opposite direction – to the left and up |
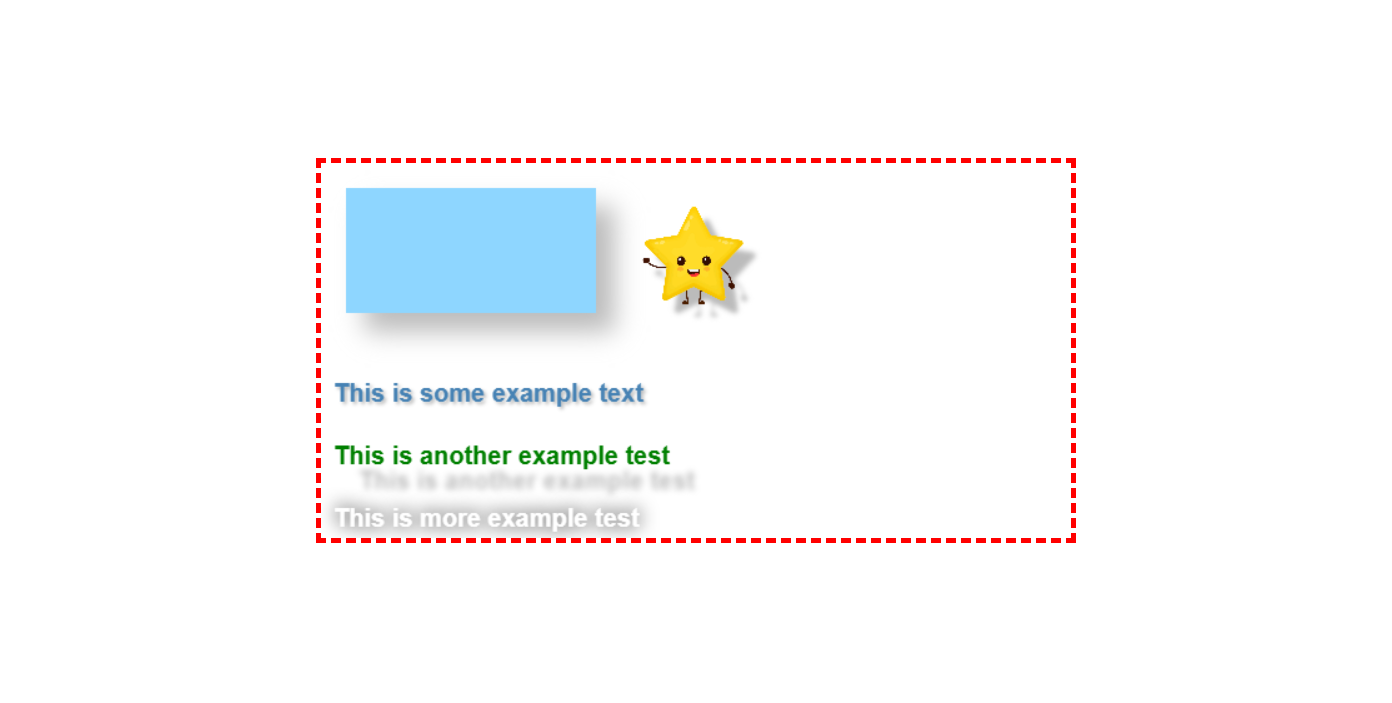
Below is an example of using shadows:
canvas = document.getElementById('my-canvas');
context = canvas.getContext('2d');

context.rect(20, 20, 200, 100);
context.fillStyle = '#8ED6FF';
context.shadowColor = '#bbbbbb';
context.shadowBlur = 20;
context.shadowOffsetX = 15;
context.shadowOffsetY = 15;
context.fill();

context.textBaseline = 'top';
context.font = 'bold 20px Arial';

context.shadowBlur = 3;
context.shadowOffsetX = 2;
context.shadowOffsetY = 2;
context.fillStyle = 'steelblue';
context.fillText('This is some example text', 10, 175);

context.shadowBlur = 5;
context.shadowOffsetX = 20;
context.shadowOffsetY = 20;
context.fillStyle = 'green';
context.fillText('This is another example test', 10, 225);

context.shadowBlur = 15;
context.shadowOffsetX = 0;
context.shadowOffsetY = 0;
context.shadowColor = 'black';
context.fillStyle = 'white';
context.fillText('This is more example test', 10, 275);

context.shadowOffsetX = 10;
context.shadowOffsetY = 10;
context.shadowColor = '#bbbbbb';
context.shadowBlur = 4;

let img = new Image();
img.onload = () => {
    context.drawImage(img, 250, 30, 96, 96);
};
img.src = 'star.png';
Filling Shapes with Images
The shapes drawn on the Canvas can be filled not only with solid or translucent colors, but also with gradient colors or patterns. Such frilly styles are sure to make simple shapes more attractive. This kind of decoration is done in two stages: first, a fill is created, which is then associated with the fillStyle property (or sometimes with the strokeStyle property).
This article is part of the JavaScript Canvas series where I post experiments, JavaScript generative art, visualizations, Canvas animations, code snippets and how-to’s.
Filling with a pattern is carried out by multiple insertion of copies of one source image close to each other. The image used as the source tile must be loaded into an image object. Given an image object, you can create a template object using the createPattern() context method. This step specifies the direction in which the tile will be copied – horizontally (repeat-x), vertically (repeat-y), or both directions (repeat). The last step is to assign the created template object to the fillStyle or strokeStyle property of the context.
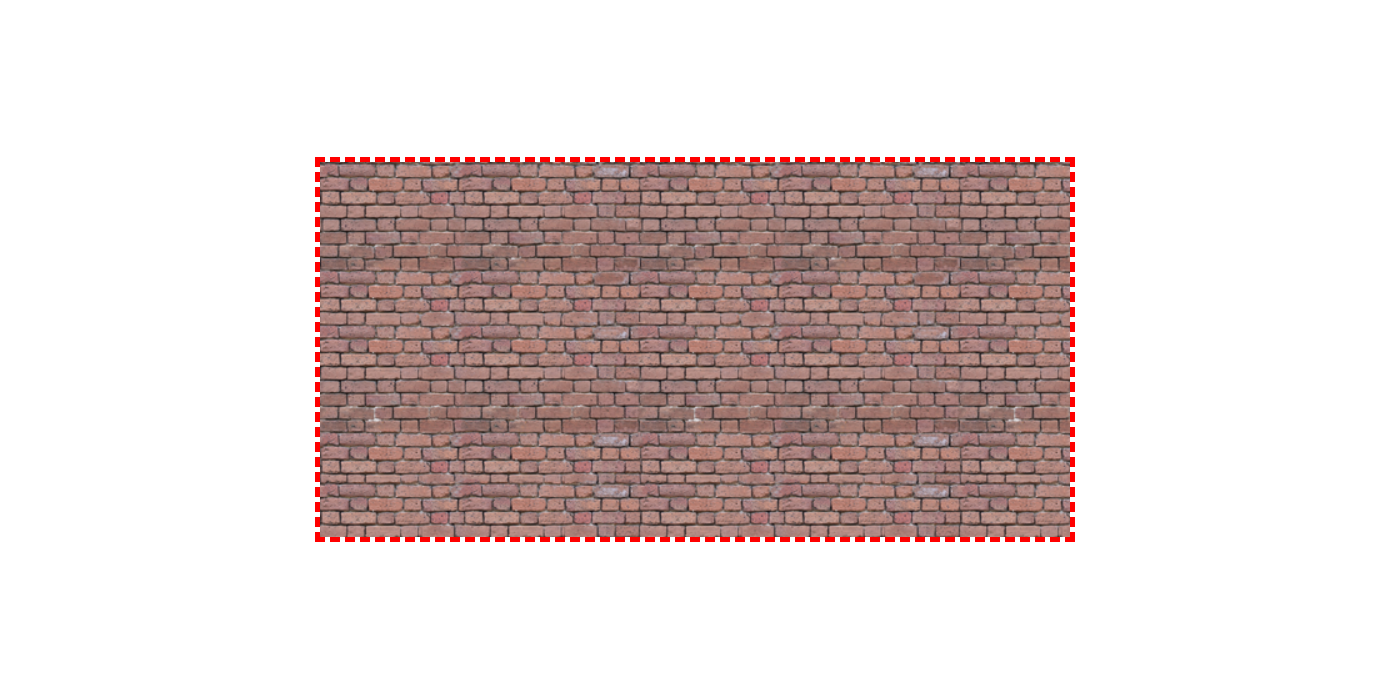
An example is shown below:
let img = new Image();
img.onload = () => {
    context.drawImage(img, 250, 30);
    var pattern = context.createPattern(img, 'repeat');
    context.fillStyle = pattern;
    context.rect(0, 0, canvas.width, canvas.height);
    context.fill();
};
img.src = 'https://www.manytextures.com/download/36/texture/png/256/red-brick-wall-256x256.png';
This code creates a rectangle that fills the Canvas with the original image:
Gradient Fill in Canvas
Another type of fill is a gradient fill, in which two or more colors are mixed. Canvas supports linear and radial gradients. The first step in creating a gradient fill is to create the correct type of gradient object. To accomplish this task, the drawing context provides two methods: createLinearGradient() and createRadialGradient(). Both methods work more or less the same: they contain a list of colors that are used at different points.
The easiest way to understand gradients is to study a simple example. As such an example, consider the code to create a gradient in a butterfly-shaped blob:
let gradient = context.createLinearGradient(10, 0, 100, 0);

gradient.addColorStop(0, 'magenta');
gradient.addColorStop(1, 'yellow');

drawButterfly(150, 150);

context.fillStyle = gradient;
context.fill();
context.stroke();

...

function drawButterfly(x, y) {
    context.beginPath();
    context.moveTo(x, y);
    context.bezierCurveTo(x, y - 23, x - 48, y - 89, x - 111, y);
    context.bezierCurveTo(x - 45, y + 32, x, y + 91, x, y + 4);
    context.bezierCurveTo(x, y + 25, x + 50, y + 50, x + 50, y);
    context.bezierCurveTo(x + 120, y - 140, x, y - 32, x, y);
    context.closePath();
}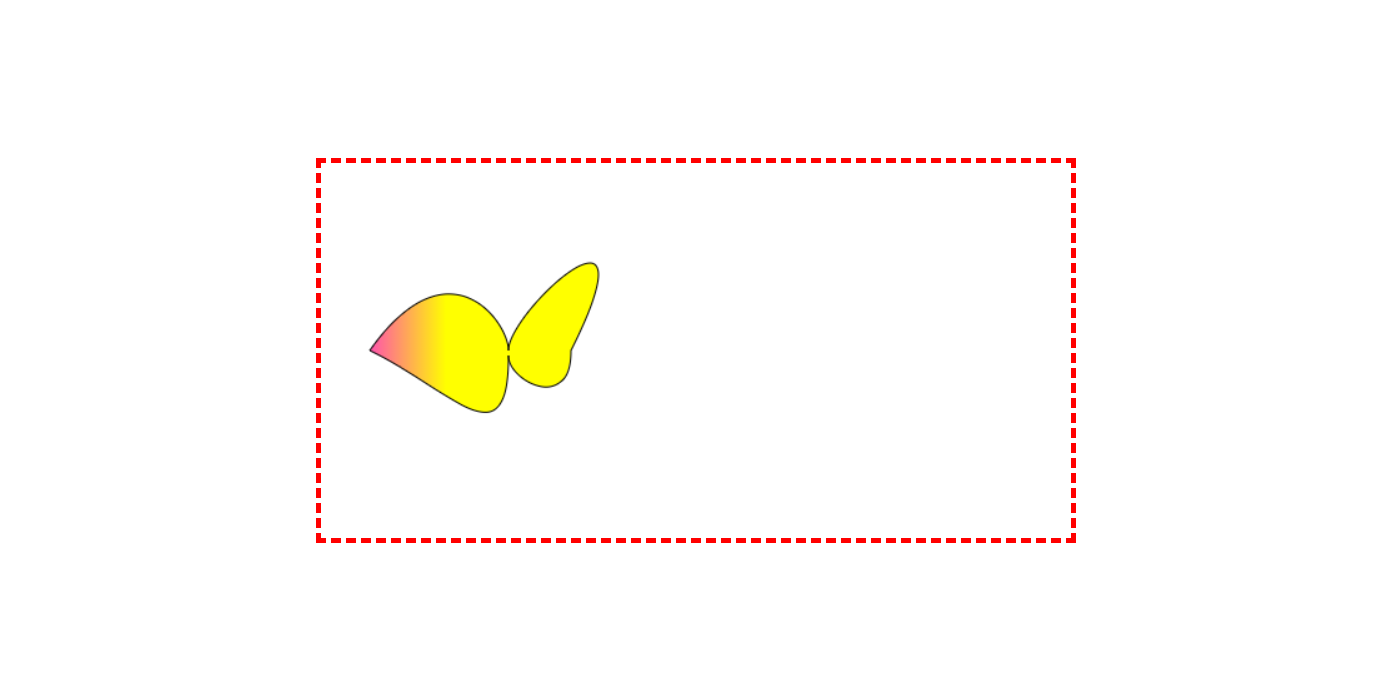
When you create a linear gradient, you specify two points to represent the start and end of the path along which the color changes. The importance of the gradient line is that it defines the appearance of the gradient.
Consider, for example, a linear gradient that goes from light pink to yellow. This transition can be done in a stripe a few pixels wide, or across the full width of the Canvas. In addition, the transition direction can be from left to right, from top to bottom, or with any slope between these two lines. All these aspects are defined by the gradient line.
In this example, the gradient line starts at (10, 0) and ends at (100, 0). These points provide us with the following important information about a given gradient:
- The gradient is horizontal. This means that the transition of colors occurs from left to right. We extract this information from the fact that both points have the same ordinate. If we wanted to perform a transition from top to bottom, then we could use, for example, the points (0, 10) and (0, 100). And to move diagonally from top to bottom, from left to right, one could use, for example, points (10, 10) and (100, 100).
- The transition itself spans only 90 pixels (starting at the
xvalue of 10 and ending when that value is 100). In this example, the horizontal dimension of the butterfly-shaped blob is slightly smaller than the dimensions of the gradient, so that most of the gradient is visible in the shape. - Colors outside this gradient become solid. So if you make the shape wider, its left edge will be a pure light pink and its right edge will be a pure yellow.
Often the size of the gradient will only be slightly larger than the shape it fills, as in this example. But other options are also possible. For example, to fill multiple shapes with different portions of a gradient, you can create a gradient that covers the entire Canvas.
Stopping the colors of the gradient is done by calls to the gradient’s addColorStop() method. Each time the method is called, it is passed an offset value between 0 and 1 that locates the color in the transition. A value of 0 means the color is at the very beginning of the gradient, and a value of 1 places the color at the end. By changing these numbers (for example, to 0.2 and 0.8), we can compress the gradient, showing a larger area of solid color at each end.
For a two-color gradient, the most logical offset values are 0 and 1. But for gradients with many colors, you can set different offsets to compress some color bands and stretch others.
The process for creating a radial gradient is the same as for a linear gradient, but instead of defining two points, you need to define two circles. This is because the gradient transition in a radial gradient extends from a smaller circle to a larger one. These circles are defined by specifying their center and radius.
Below is an example that expands on the previous one. It adds a linear gradient with multiple colors, as well as two-color and multicolor radial gradients:
let gradient = context.createLinearGradient(10, 0, 100, 0);
gradient.addColorStop(0, 'magenta');
gradient.addColorStop(1, 'yellow');

drawButterfly(150, 150);
context.fillStyle = gradient;
context.fill();
context.stroke();

gradient = context.createRadialGradient(180, 100, 10, 180, 100, 50);
gradient.addColorStop(0, 'magenta');
gradient.addColorStop(1, 'yellow');

drawButterfly(180, 100);
context.fillStyle = gradient;
context.fill();
context.stroke();

gradient = context.createLinearGradient(10, 0, 100, 0);
gradient.addColorStop(0, 'magenta');
gradient.addColorStop(.25, 'blue');
gradient.addColorStop(.50, 'green');
gradient.addColorStop(.75, 'yellow');
gradient.addColorStop(1.0, 'red');

drawButterfly(80, 180);
context.fillStyle = gradient;
context.fill();
context.stroke();

gradient = context.createRadialGradient(180, 250, 10, 180, 250, 50);
gradient.addColorStop(0, 'magenta');
gradient.addColorStop(.25, 'blue');
gradient.addColorStop(.50, 'green');
gradient.addColorStop(.75, 'yellow');
gradient.addColorStop(1.0, 'red');

drawButterfly(180, 230);
context.fillStyle = gradient;
context.fill();
context.stroke();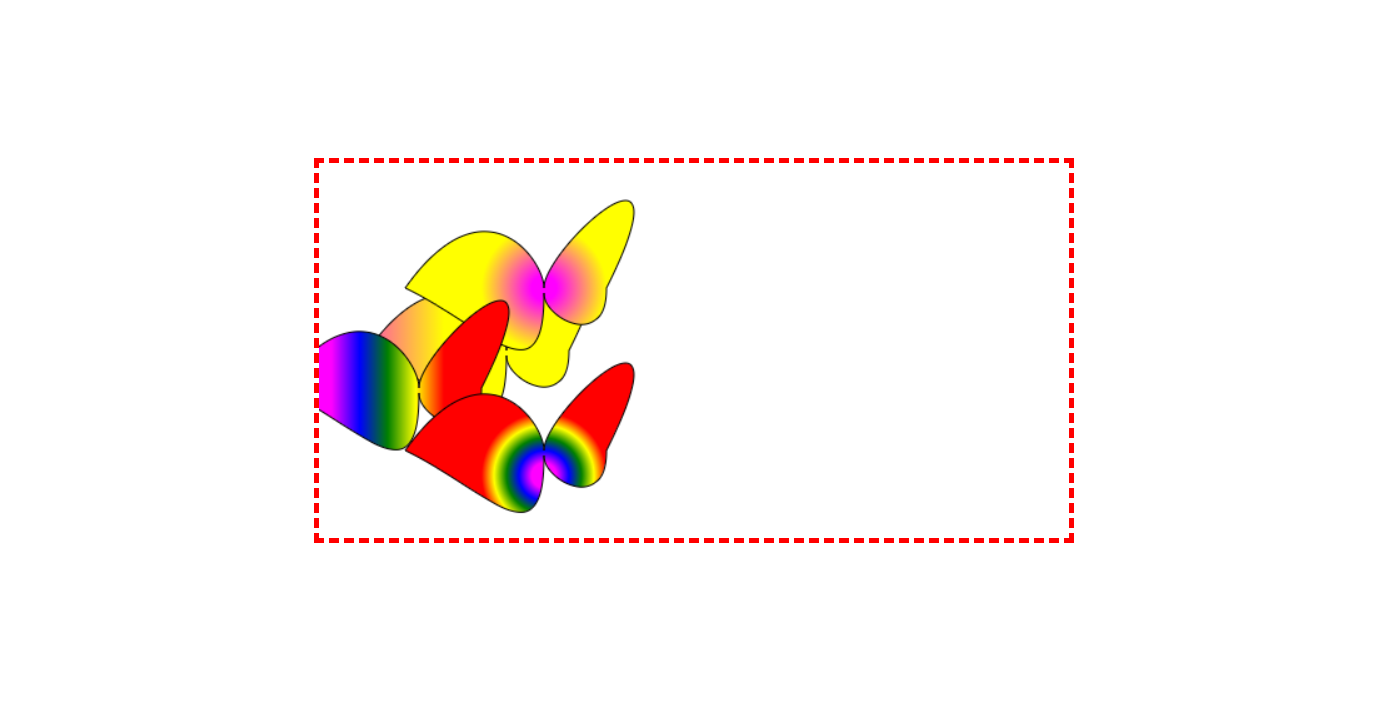
In the upper right shape of the radial gradient example, the color transition extends from the center point of the shape at coordinates (180, 100). The inner color is limited to a circle with a radius of 10 pixels, and the outer color is limited to a circle with a radius of 50 pixels. Again, if we go beyond these limits, we get solid colors – light pink in the center and yellow around the outer circle.
← Previous: 2D waves | Next: Transforms and transparency →