I wrote before about this topic, and I have proactively created WordPress plugins, code, and functionality to successfully prevent malware attacks on WordPress websites.
The latest attack on my 400+ websites was prevented by using 2 of my plugins:
Lighthouse
Lighthouse is a WordPress performance & security tuning plugin, removing lots of default WordPress behaviour, such as filters, actions, injected code, native code and third-party actions.
WP Guardian
WP Guardian monitors all incoming web requests to the site using simple heuristic analysis, detects and prevents the most common attacks. It’s worth noting that there are many similar solutions that perform similar tasks; but they are not always installed on the latest versions of WordPress, do not always work as they should, and are often simply difficult to install and configure.
For the WordPress websites without these plugins, Wordfence helped remove the offending code, the injected malware and the created content.
Table of Contents
Security Settings
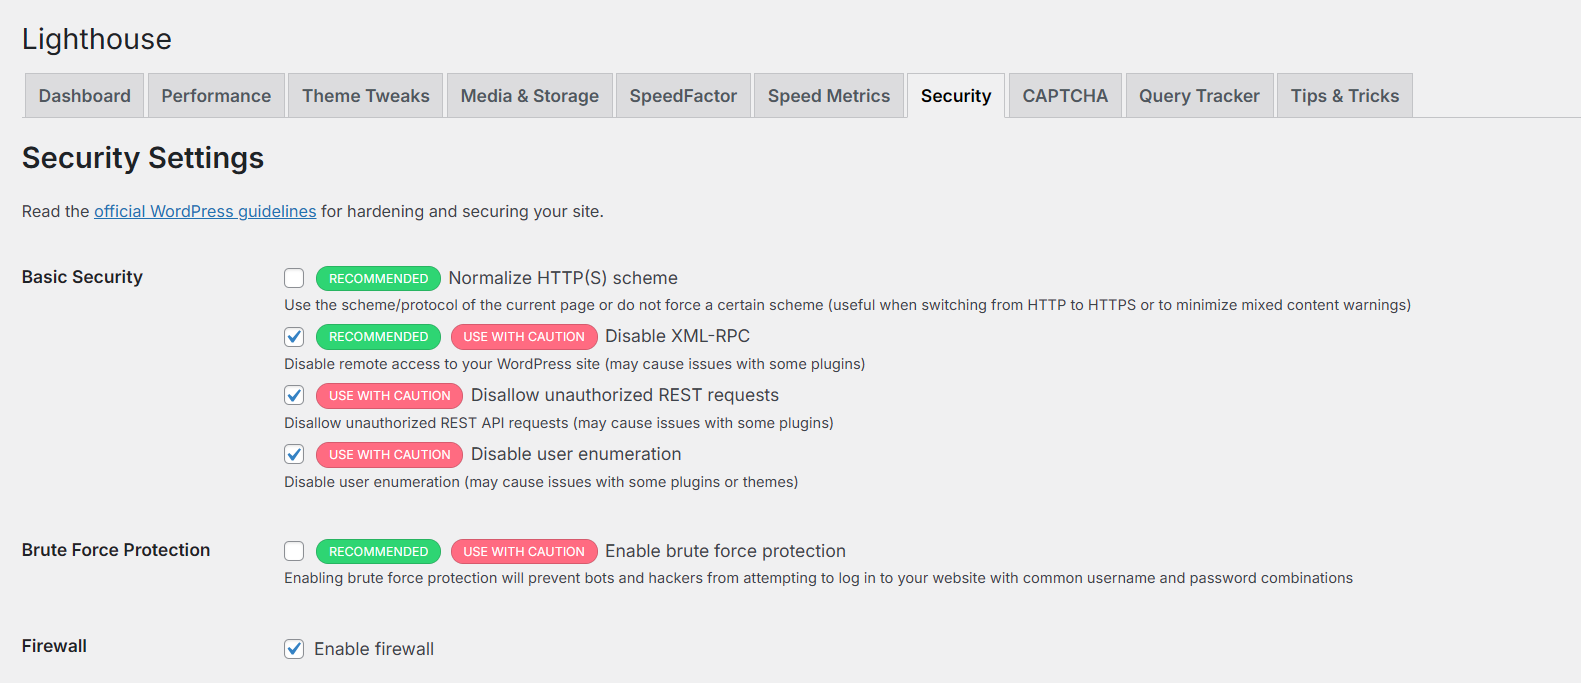
The Best Lighthouse Security Settings
Lighthouse is primarily a performance/pagespeed plugin, so security is secondary. Lots of the options are opinionated, based on my personal experience.
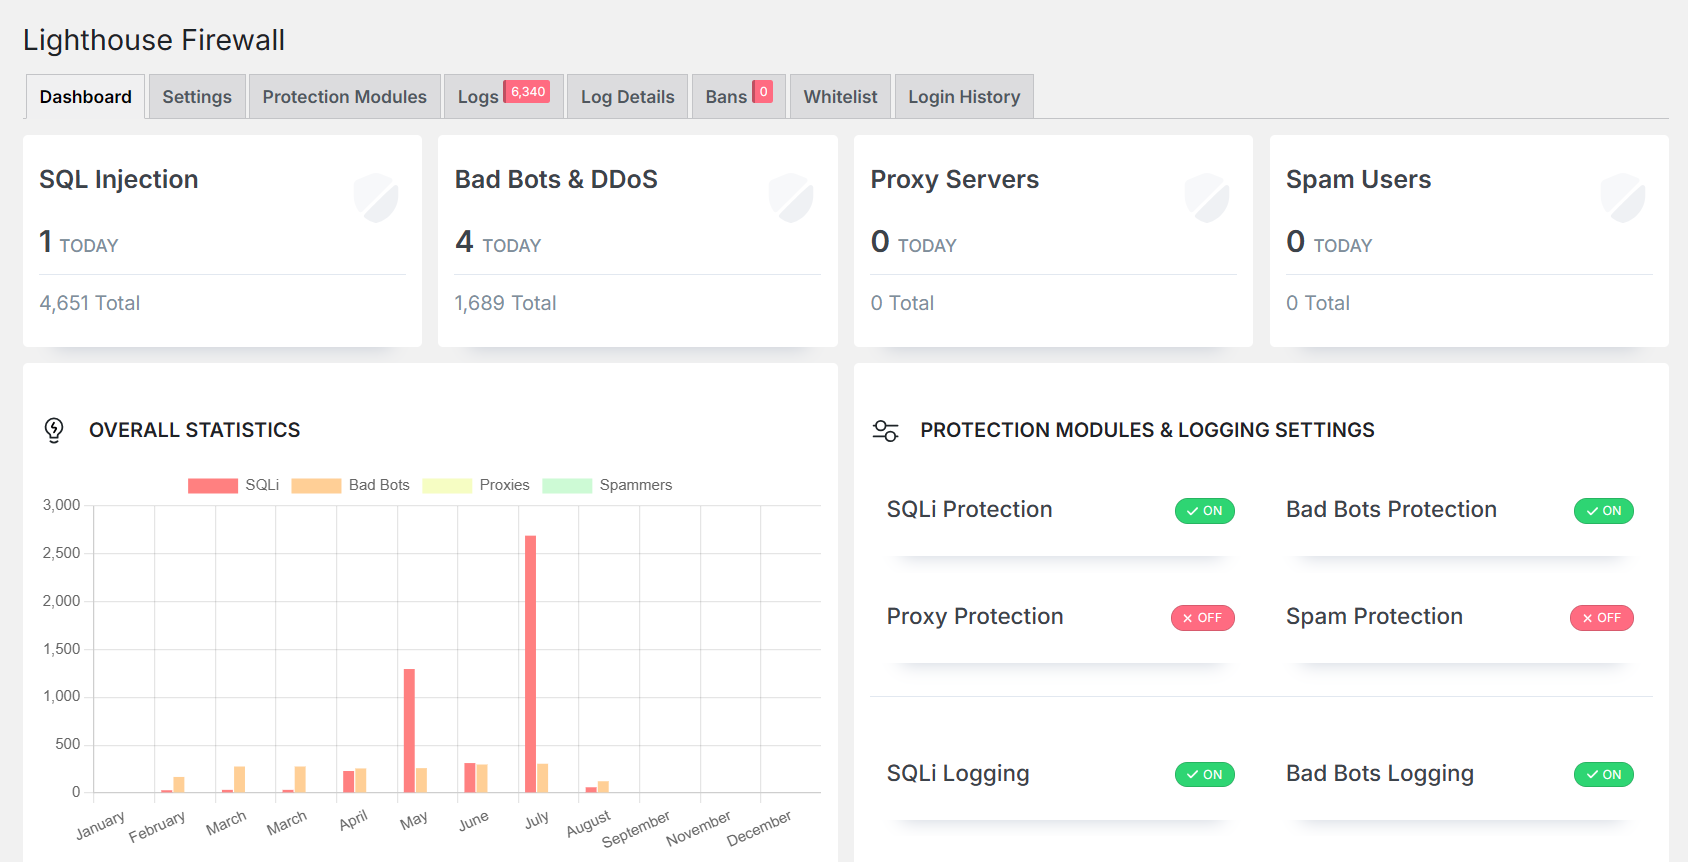
First, head over to Lighthouse → Security and enable the options, as below:
If you allow user registration, and you use the native login/registration pages, scroll down and set some more options. The “Periods” pattern is sometimes seen in email addresses such as this.is.my.e.m.a.i.l.address@gmail.com. it’s obviously spam, based on the amount of periods. Setting it to a maximum of 2 will solve this problem.
The 4P external blacklist, is a manually maintained list, and it’s available on GitHub. Again, it’s based on patterns found on thousands of websites I maintained, cleaned or hosted at some point in time.

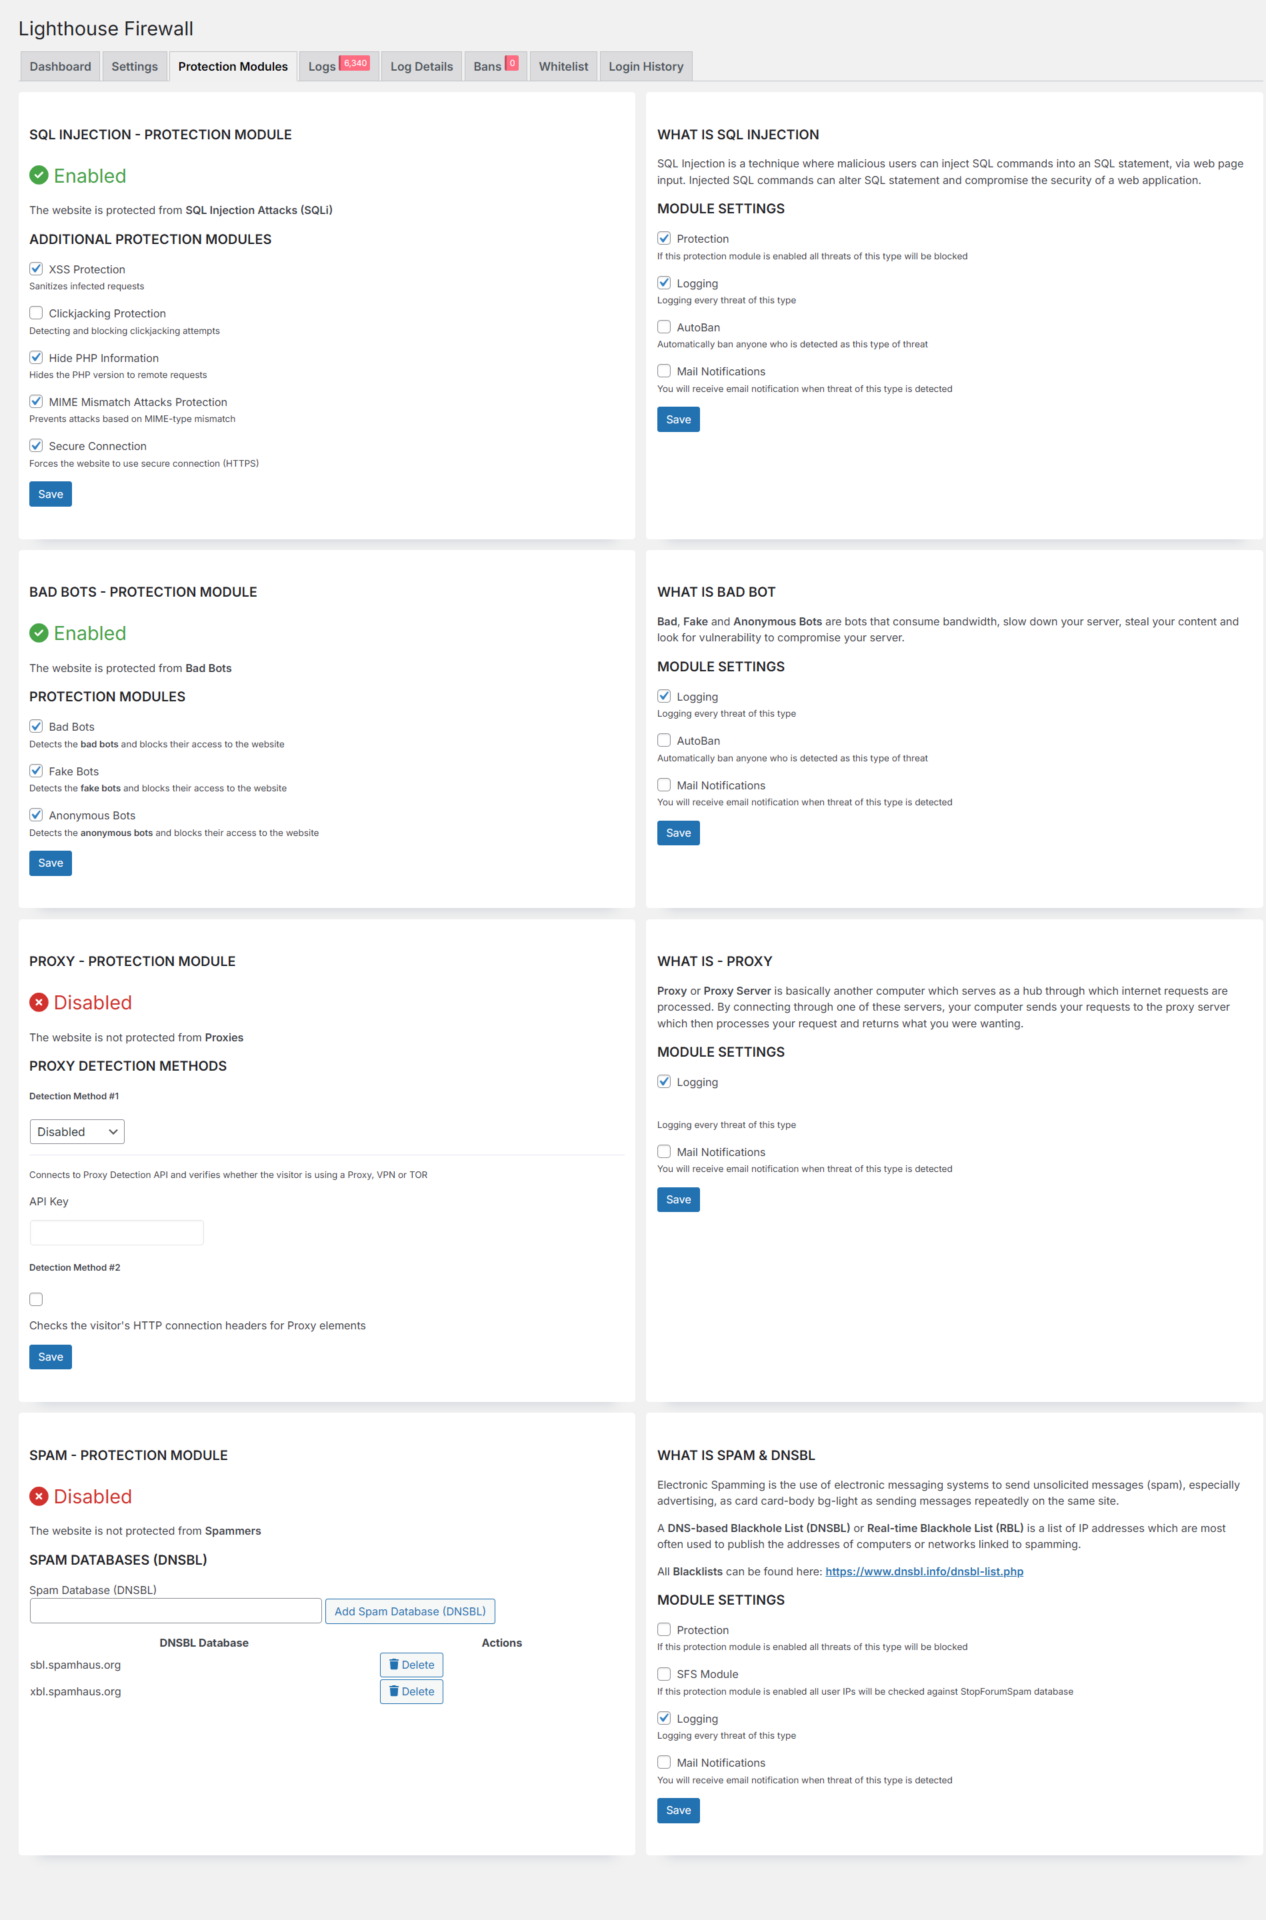
Enabling the Firewall option will open a second settings page.
Head over to the Protection Modules tab and enable what you think is best for your website configuration. See an example and suggested settings below:
The Best WP Guardian Security Settings
As this is a free plugin, and it’s meant to protect small websites, I recommend enabling all options. The plugin will give you an idea of the attack rat eon your website, and it will point you in the right direction — installing Lighthouse above and Wordfence below.
The Best Wordfence Security Settings
TL;DR — Copy the string below into your Wordfence → Tools → Import section. These are the best medium-high-security settings for Wordfence. If you need more, take it from there and increase values or add more checks.
Here’s a detailed explanation on each setting.
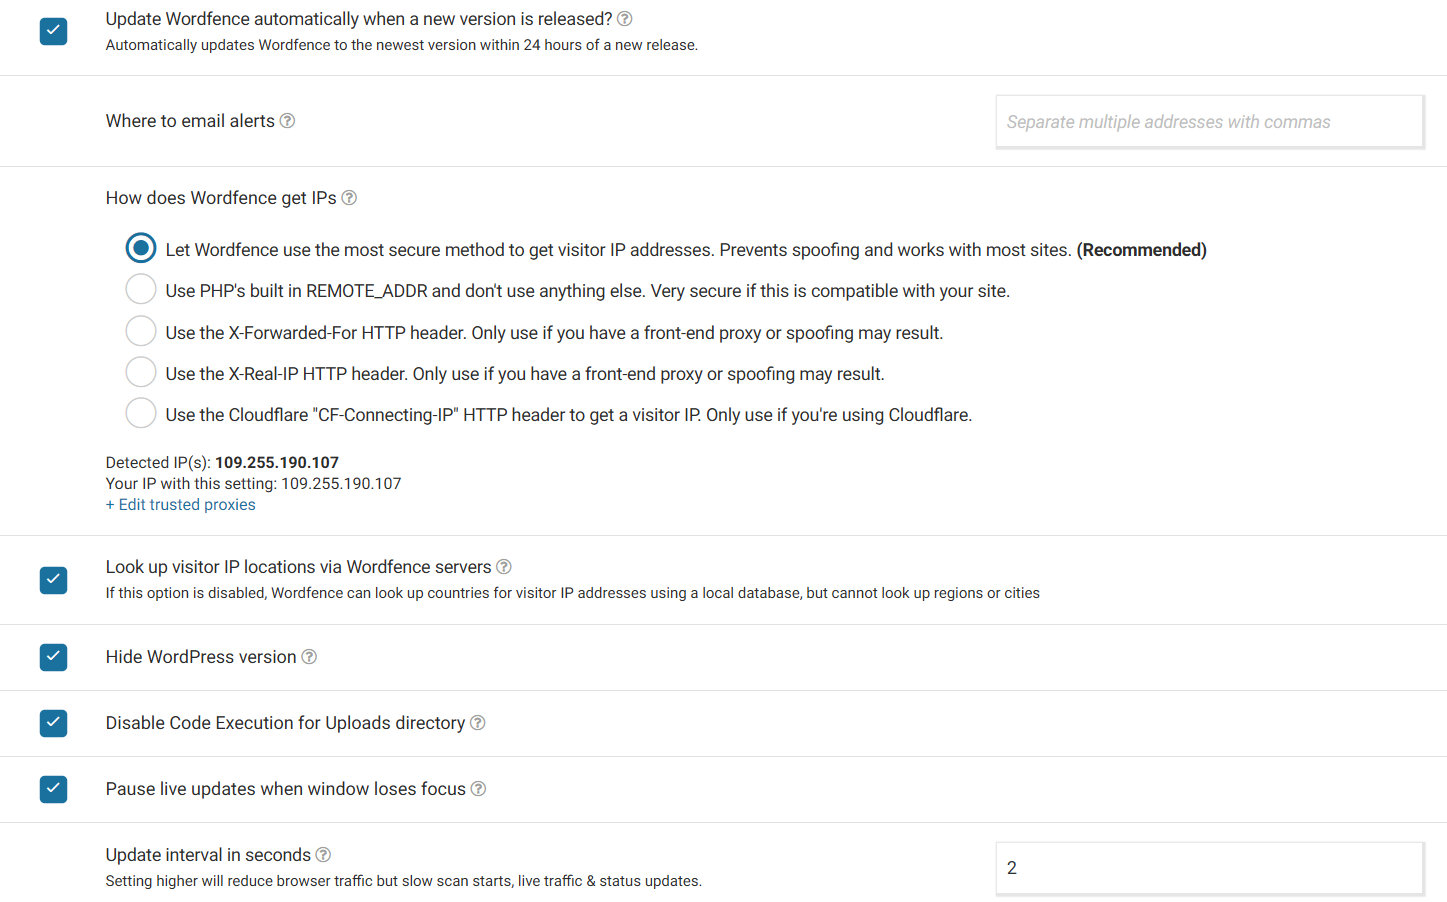
First of all, we want to make sure the Wordfence plugin is being updated automatically, so we’ll tick that option. Second, we need to enable the firewall. The firewall will stay in learning mode for a week or two, to learn patterns, users, admins and IP addresses, and then it will fully activate.
Second, we want peace of mind, so we don’t want the plugin to send us thousands of notifications, and we don’t want to see the plugin’s widgets everywhere. So, no widgets on Dashboard, no daily or weekly emails, no activity reports either.
Make sure you fill in your email address below:
I have manually edited the notification types for the most important events. You don’t want to be bombarded with emails on an hourly basis. Note that if you are using an email delivery platform (such as SendGrid), and you have a quota, you might run out of monthly emails (free or otherwise)
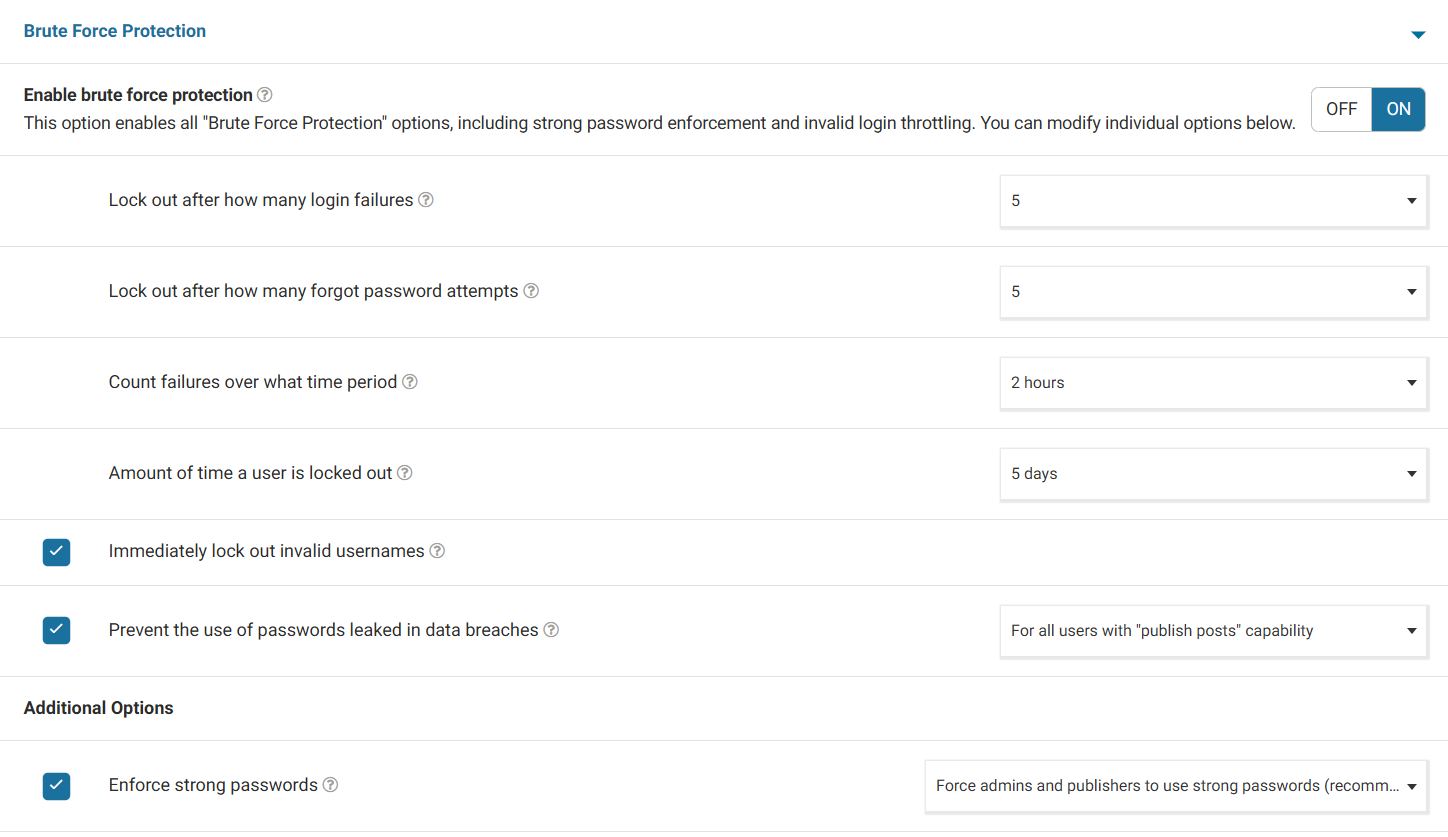
Next, the Brute Force Protection section has everything enabled. The lockout values are below:
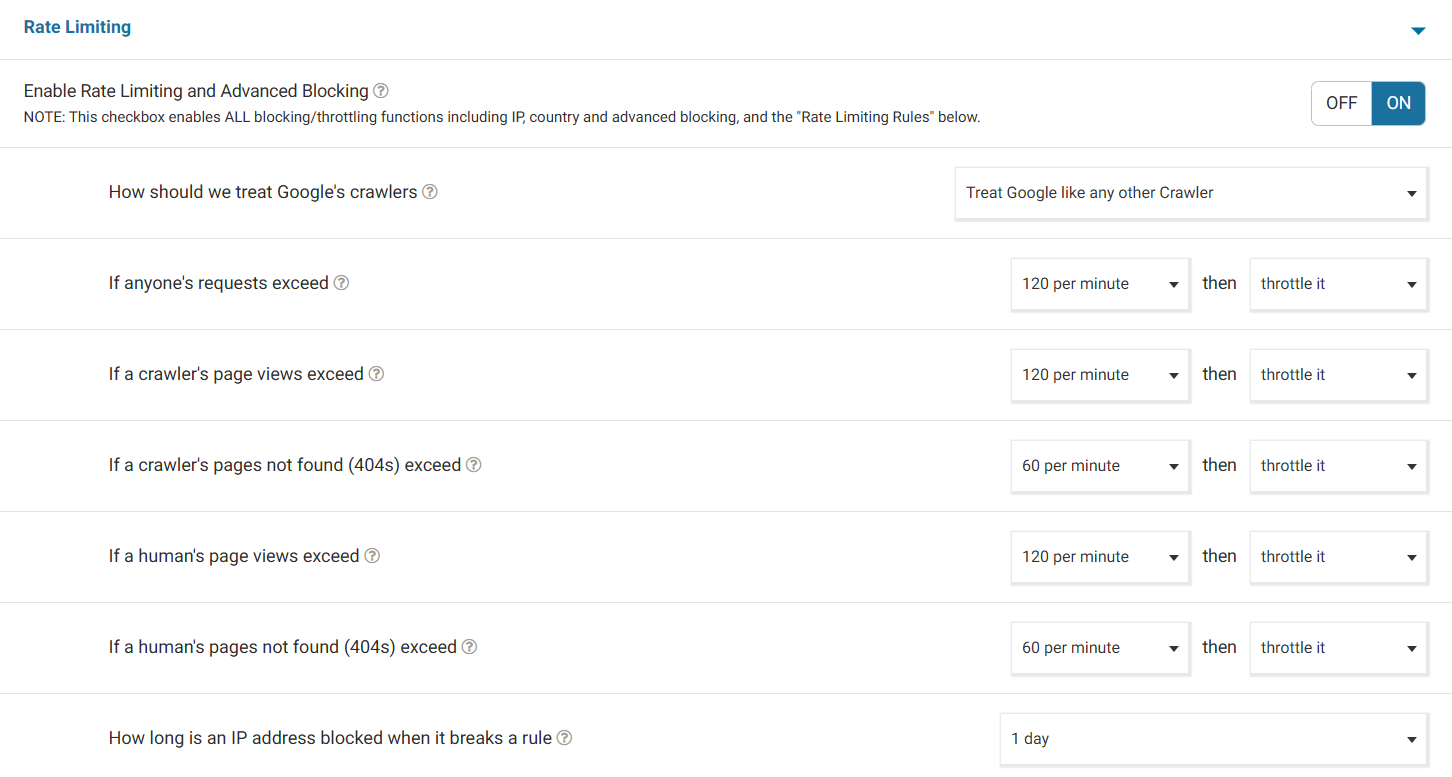
Next, the Rate Limiting section has been tweaked to reflect real-life malware attacks:
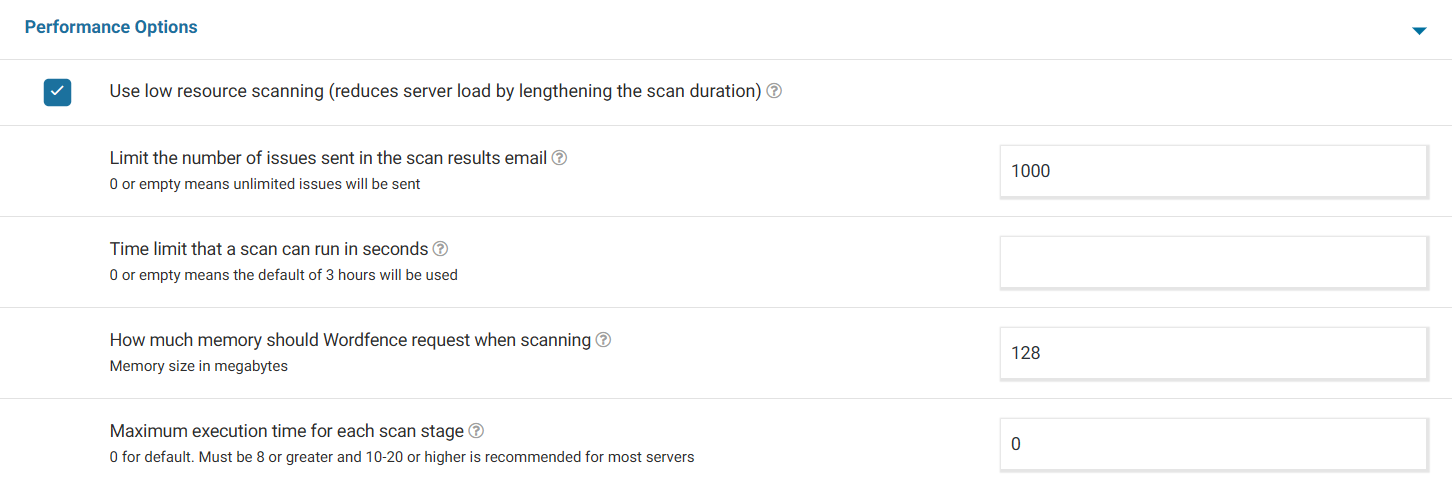
Next, what really helps if your website has been hacked, is the General Scan Options section, where everything needs to be ticked, except for the last option — “Scan images, binary, and other files as if they were executable”.
And last, so that you can really have peace of mind and not worry about your website going down, set the performance options to low, as below: